Welcome to Section 5 of the Beginner's Website World Training Course.
By the end of this section, you will be able to:
- set up freight/shipping fees
- set up currency and tax options
- set up payment options
- set up a voucher
- set up a discount code
Setting Up Freight & Shipping Fees
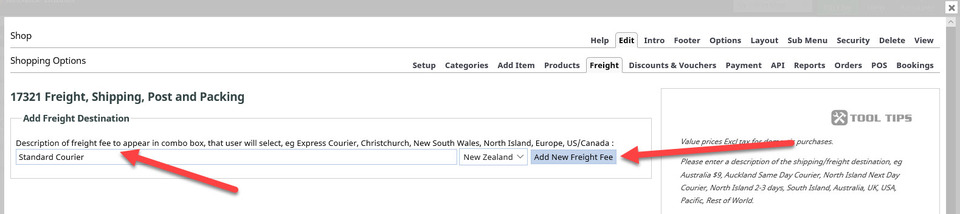
Freight or shipping fees are the additional costs your customer must pay for you to send their purchase to them. In the CMS, you are able to set specific fees individually. In this example, we will only one freight fee: Standard Courier (for orders up to a value of $50 and with free shipping for orders $50 and over NZ only).
From your Shopping Options, choose the Freight/Shipping Fees button. For this freight fee, add the name and click the Add New Freight Fee button, as in this image:
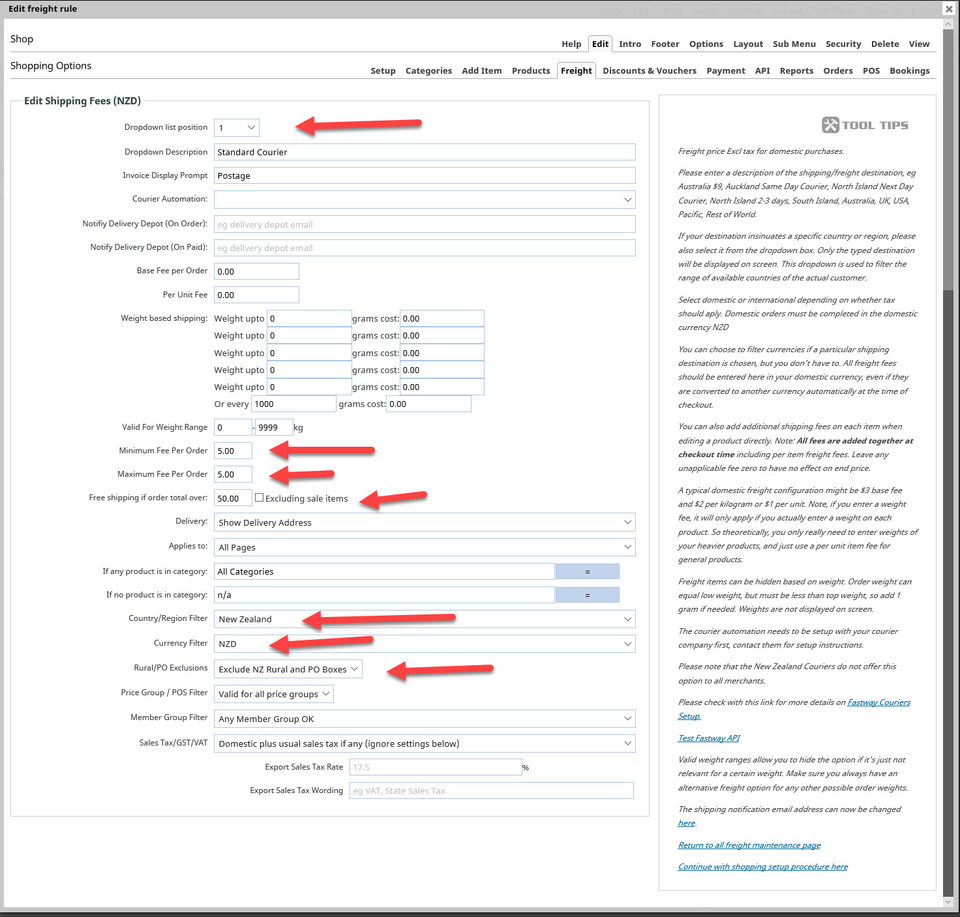
Now it is a matter of working through the page row by row. Here is a screenshot of the default settings, followed by a screenshot of the areas we edited for this example (arrows show where we made edits).
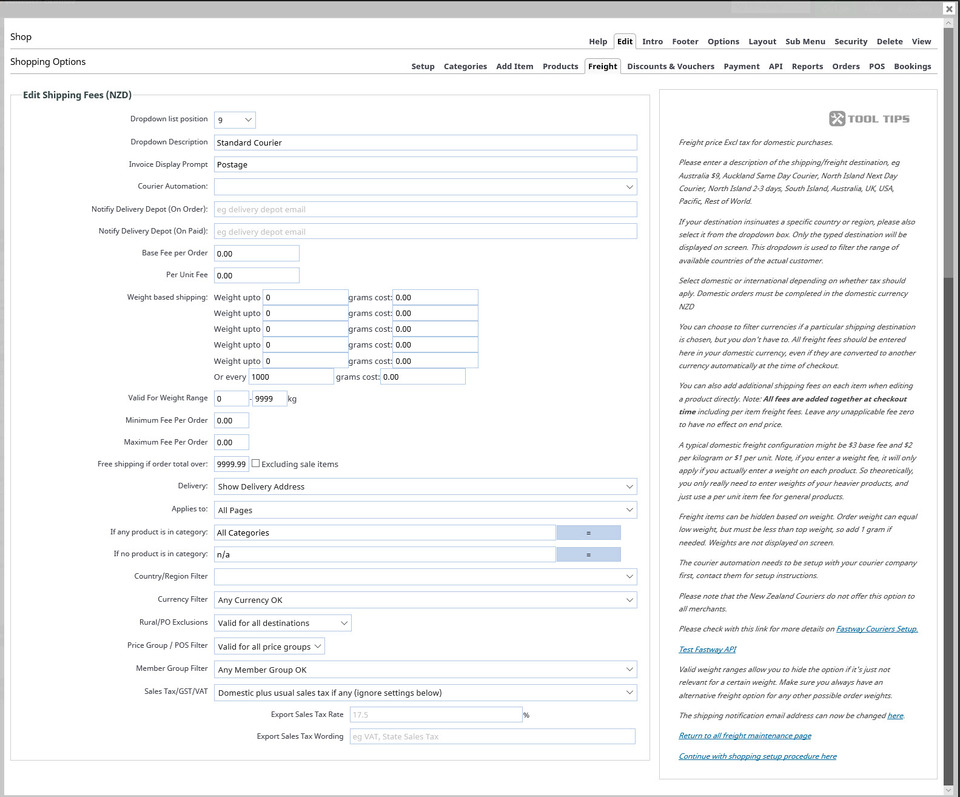
Close this and the following box by clicking on the right hand top X, and click the Publish button to save changes so far.
Setting Currency & Tax Options
To set your currency and sales tax options, from Shopping Options, choose Currency/Tax Settings. You will then see this page on which you can select your main currency (only one main currency per shopping cart), your GST rate and number (if you have one), and the way in which you would like pricing to be displayed. You can also set fixed currency conversions.
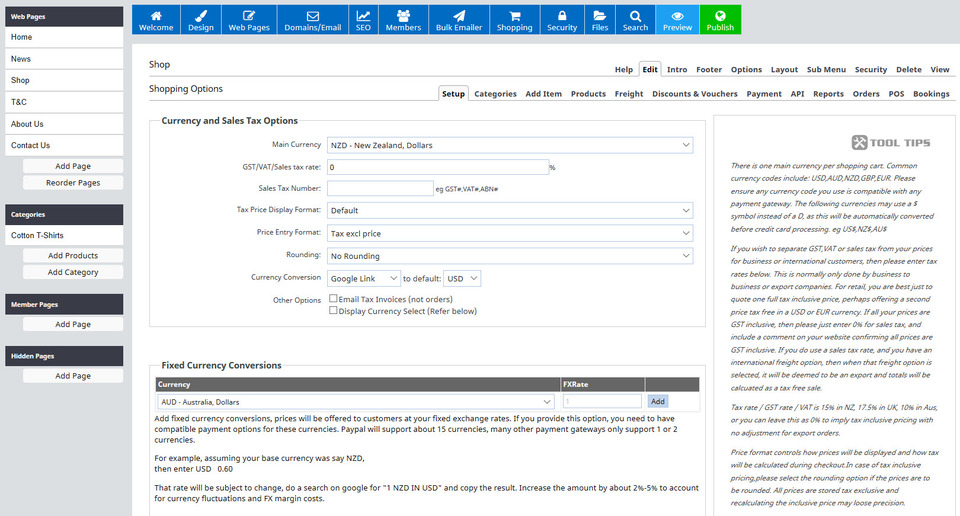
For this example, we will select:
- main currency of NZD
- No GST or tax rate
- No sales tax number
- None, for tax price display format
- Tax excl price for price entry format
- No rounding
- Currency conversion, none
Then for fixed currency conversions, we're also leaving that empty too. But it is here that you would add fixed exchange rates for overseas customers shopping on your website.
Press Save Changes, and then the green Publish button.
Setting Up Payment Options
The payment options area lets you set how you would like to be paid for products purchased from your website. You can have as many different payment options as you like, but more isn't necessarily better.
You can find all of the payment options and gateways which work with the CMS by choosing Shopping and then Payment Options, as shown below:
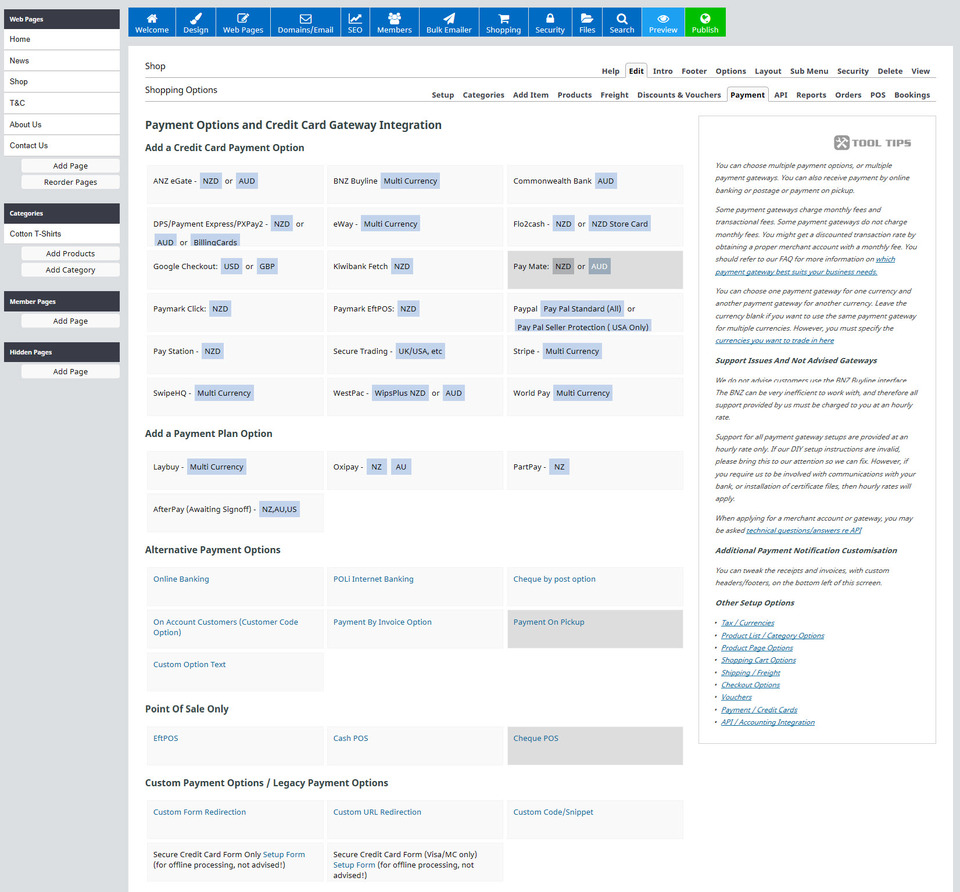
It's up to you to decide which payment options to pick. You will need to first sign up with your chosen payment option before you can enter the required details into the CMS. You can learn more about what information is required by clicking on your preferred payment options. You will then need to follow the specific DIY instructions in the CMS when adding a payment option to your website.
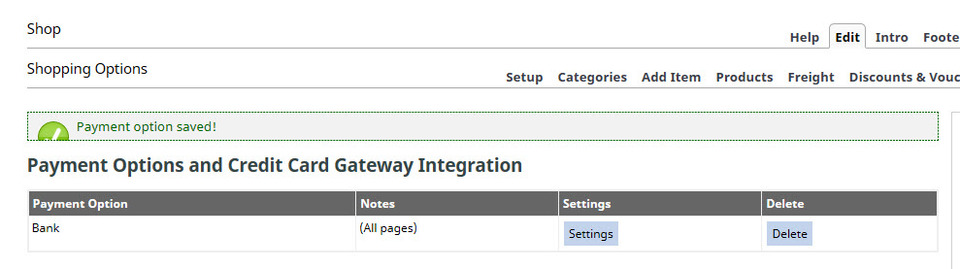
For this example website, we have added fake bank account details, then saved the details, resulting in this announcement:
Setting Up a Discount Code & a Voucher
There is often a lot of confusion regarding the setting up of vouchers and discounts. This is usually due to a misunderstanding of what each one is.
- A single voucher is intended to be used only once, such as a gift voucher to be used on your site. Vouchers cannot be assigned to an individual product, nor individual categories.
- A discount code can be used many times, such as when you give a code to many people to buy something off your site for a discounted price.
There is also the option to sell vouchers as a voucher product. You set this up just like you would a product, but we're not covering that in this section.
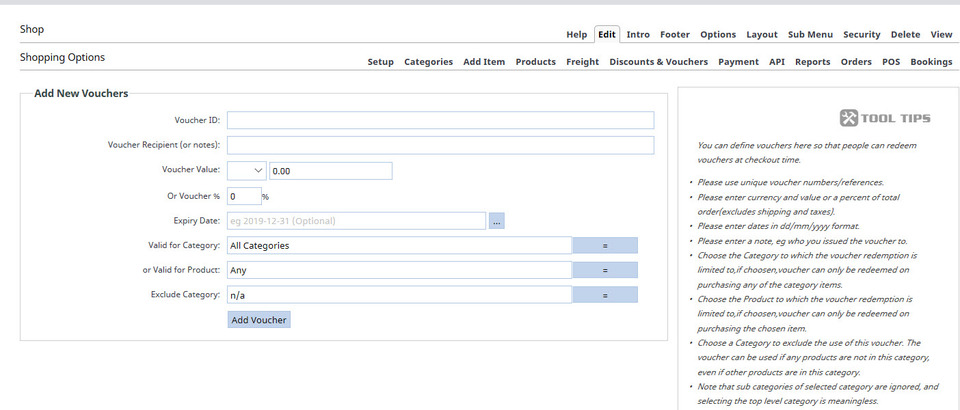
We'll set up a single use voucher first. In the Shopping menu, click the Discounts/Vouchers/Promo Codes option. Next click on the Create Vouchers option. You will see a screen like this:
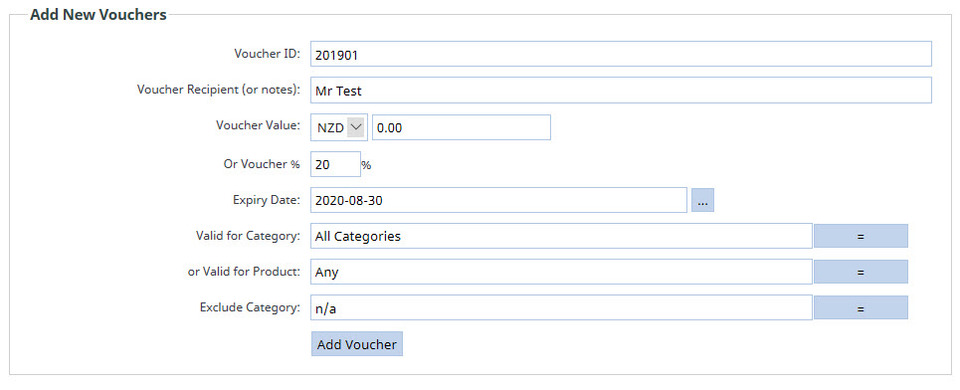
Remember that a voucher can only be used once, and that every voucher you create must have its own unique Voucher ID. Here is what we've filled in to give the voucher user a 20% discount off any purchase on this website.
After clicking the Add Voucher button, this is what we can see in the Manage Vouchers option:

The check box on the left is where you click when you'd click to manage the voucher to:
- Disable Online Purchase
- Enable Online Purchase
- Redeem In-Store
- Cancel
- Delete
A discount voucher gives you the opportunity to:
- Add % Category Discount
- Add Buy x Get y Free Promo
- Add Custom Promotion/Discount
The first two are quite self explanatory. For the % category discount, you enter the % discount, the category the % is for and the number of times the discount can be used. For the buy one get one promo, you state which category the promo is valid for, how many products need to be purchased for the promo to be triggered (including the free one - so if you were offering buy 2, get 1 free, then you would list the buy quantity as three), and the number of products which would be free.Remember that promotions and discounts can be used multiple times, unlike vouchers.
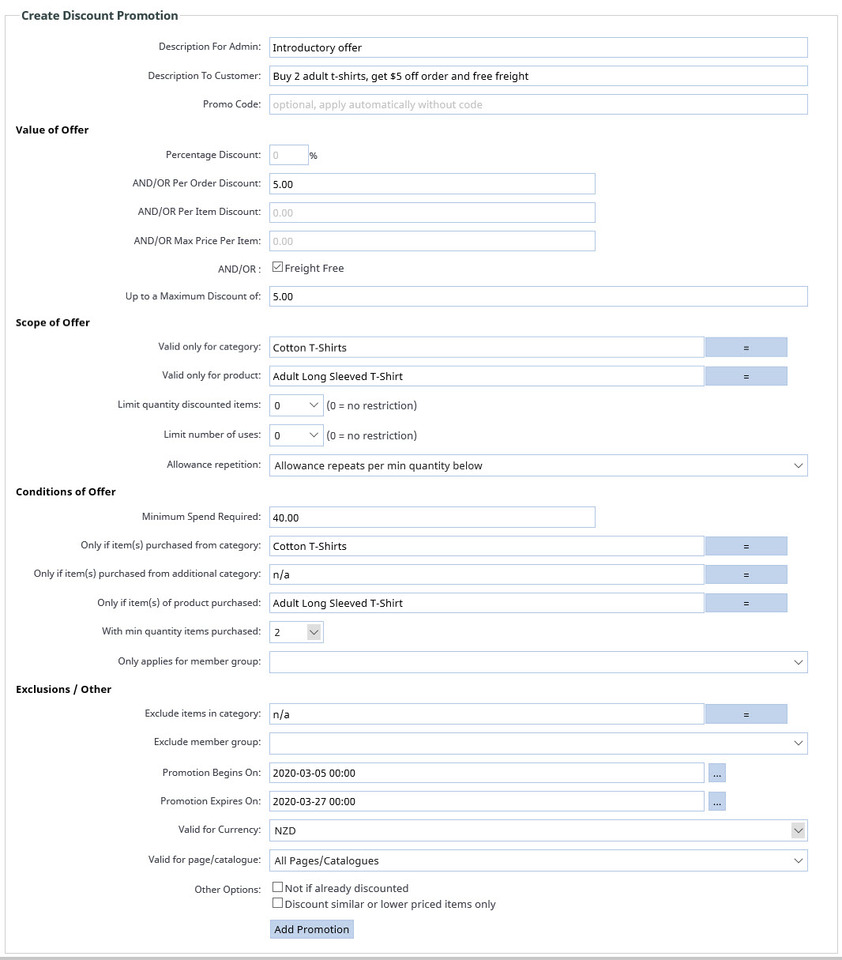
The custom promotion or discount option gives you a lot of control over your promotion. Here is what we have done:
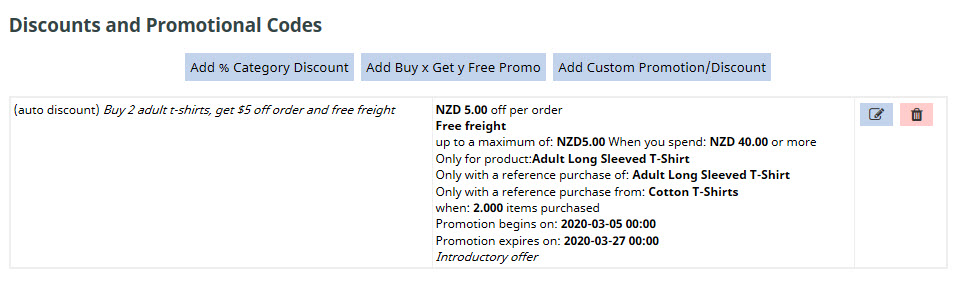
This is what we see after clicking the Add Promotion button:
This concludes section 5. You can now take Assessment 2.