- use the setup wizard to create a trial website
- add, remove and rename pages of your trial website
- add page titles, sub headings and paragraph text to a web page
- add an image to a web page
- add a logo to your trial website
Use the Setup Wizard to Create a Trial Website
Sign up for a free trial website by:
- Clicking upon the Start Your Trial button
- Clicking on the Select button on the Decor Theme website template (you can select another theme if you prefer, just know that during the course, we will demonstrate using the Decor Theme template)

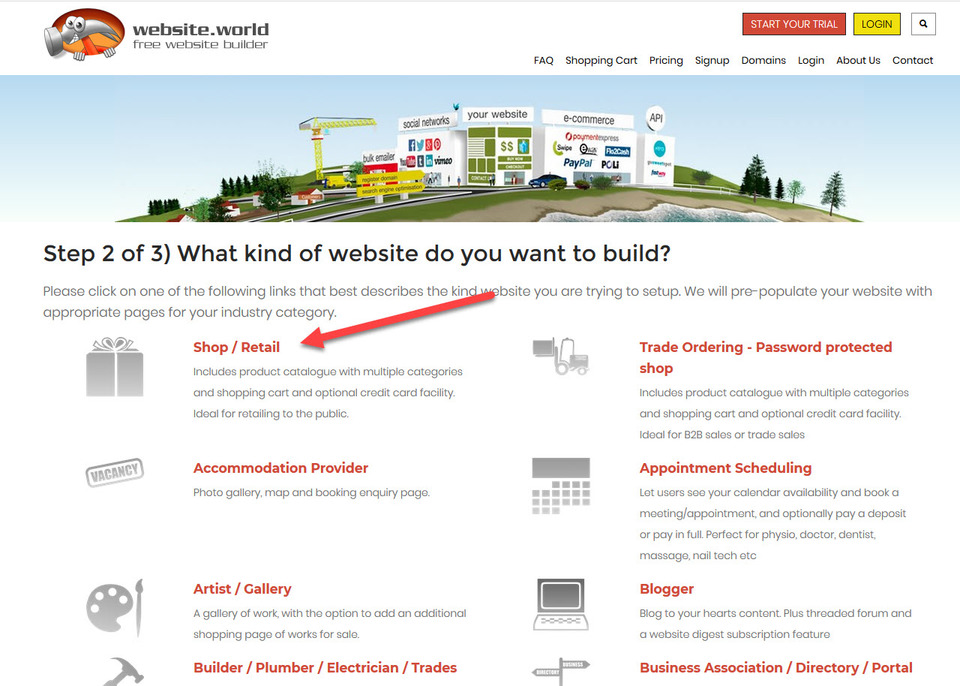
Next you will need to select the type of website, which for the purposes of this course will need to be the Shop/Retail option
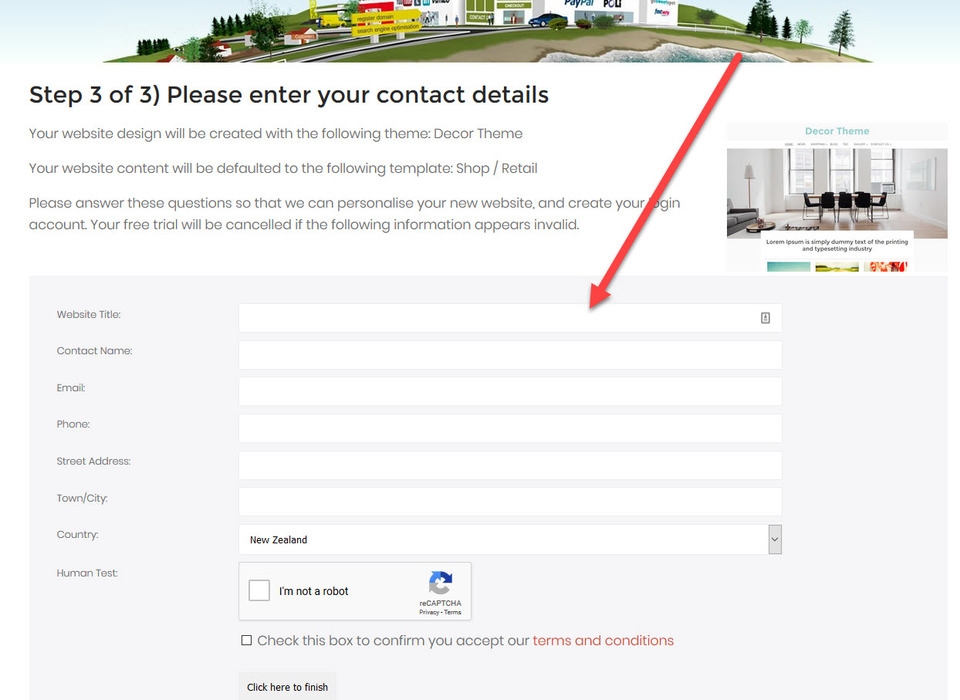
Next you will need to enter your contact details, along with a name for your website. For this course, we will use the name My T-Shirt Shop
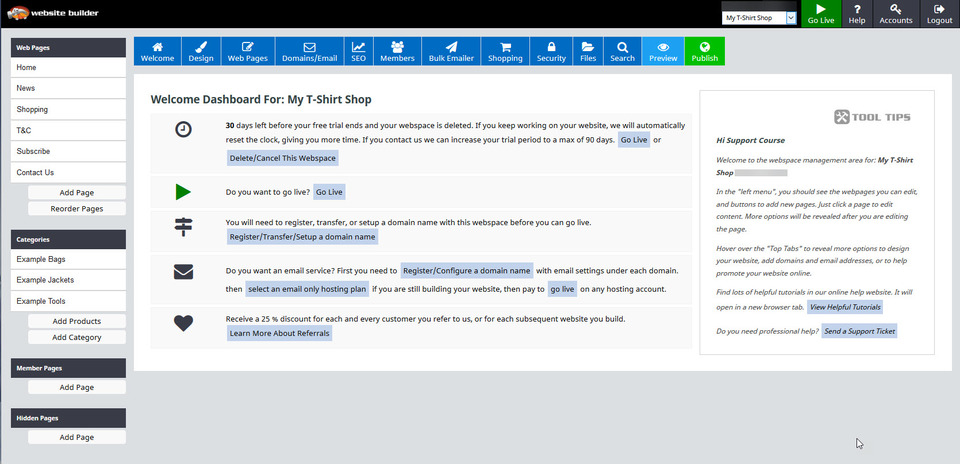
You will now receive an email from Website World which contains login details and a temporary password for your trial website. After entering your temporary password, you will be directed to the welcome page inside the CMS (content management system). It is here where you will be editing and designing your new website.
The template and type of website we chose resulted in some pages being automatically added as example pages. As the site is not live, you will be able to add and remove pages, or rename them without any penalties from search engines (which could occur if the site was live).
Adding, Removing and Renaming Web Pages
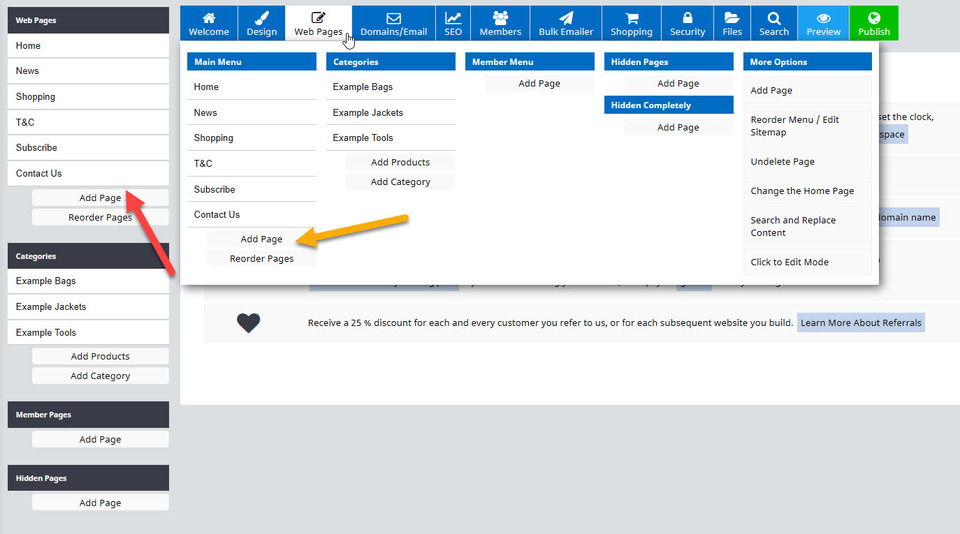
To add a new page to your website, click on the Add Page button on the left hand site of your screen (red arrow), or from the drop down menu of the Web Pages tab, the Add Page button (yellow arrow).
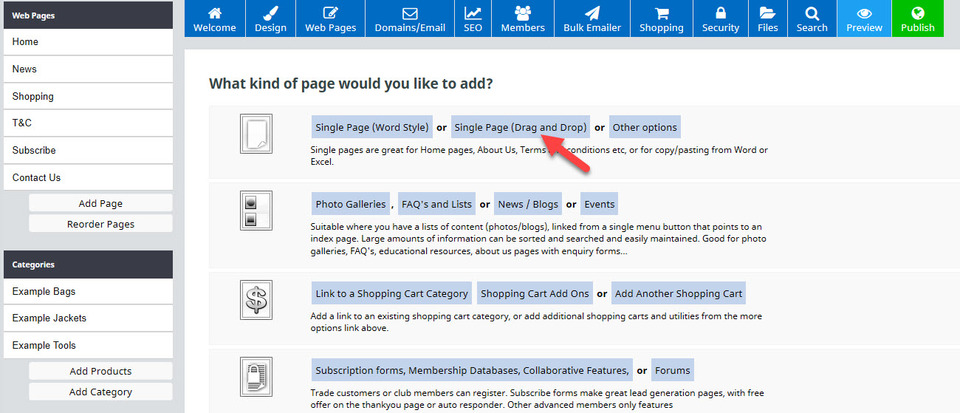
On a new screen, you will be asked what kind of page you would like to add. For the purposes of this course, we will add a Single Page (Drag and Drop).
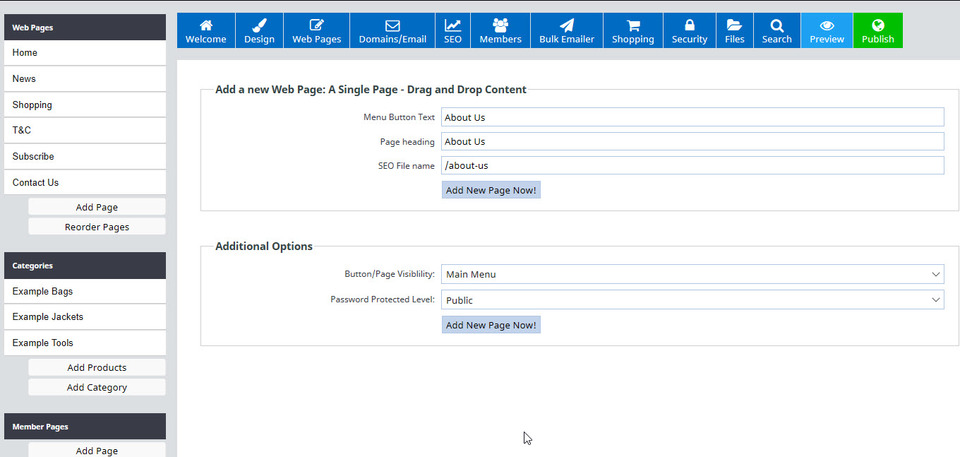
After clicking on the Add New Page Now! button, you will be directed to your new About Us page. It will also be automatically added to your menu display on the left hand side of your screen, plus your menu bar on your website.
Deleting and completely removing a page from a website when it is not something we recommend due to SEO reasons. You should instead change the visability of the page to block it from being found and viewed, plus remove it from the menu. If you must delete it, be sure to redirect it's URL to a live page.
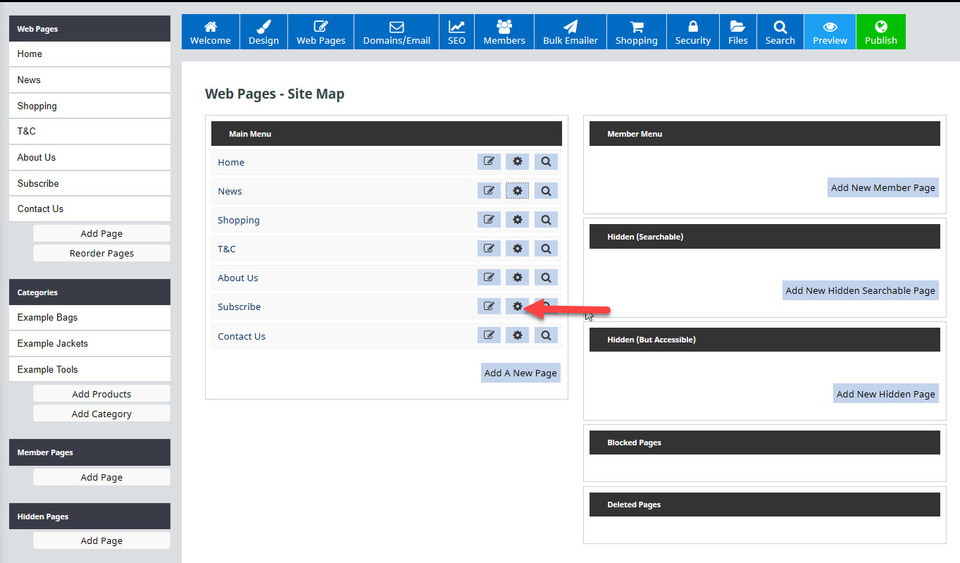
As a trial site, which your website is currently, it is fine to remove a page and delete it. To do this, click on the Web Pages button, which will in turn open up a site map page listing all of your current pages. For this example, we are going to delete the Subscribe page. First click upon the wheel cog icon next (red arrow).
This will then open up a screen giving you options for this page. Choose the Delete This Page button option. A warning message will pop up. Click on the Delete Page Now button, then close that screen by clicking on the X in the corner.
Renaming a page is also done via the web pages site map page. Click on the Web Pages button, and select the Shopping page wheel cog icon this time. The area you want to edit are the button text, page heading and SEO filename. Be aware that once your website is live, you should not change any SEO filename as to do so creates broken links on your website, and search engines believe that as it has a new filename, it is a new page. You consquently lose any SEO benefits that page had. You can change your filenames without penalties if your site is still in trial mode however.
For the purposes of this course, we are changing the button text from Shopping to Shop, and the Page Heading from Shopping to T-Shirt Shop.

Add Page Titles, Sub Headings & Paragraph Text to a Page
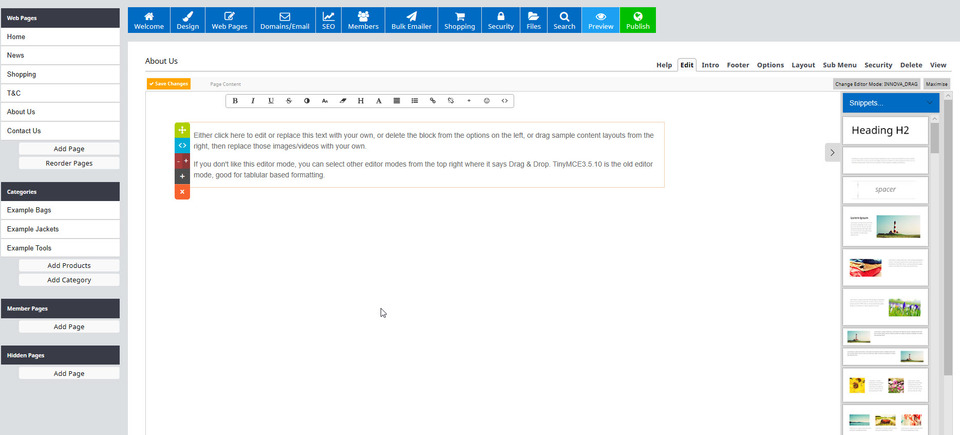
To edit a page to add titles, headings and paragraph text, click on the page name under the Web Pages tab on the left hand side of your screen. This will then open up the page to edit. In this example, we're going to edit the About Us page, as seen below, using the Innova Studio Drag and Drop Editor.
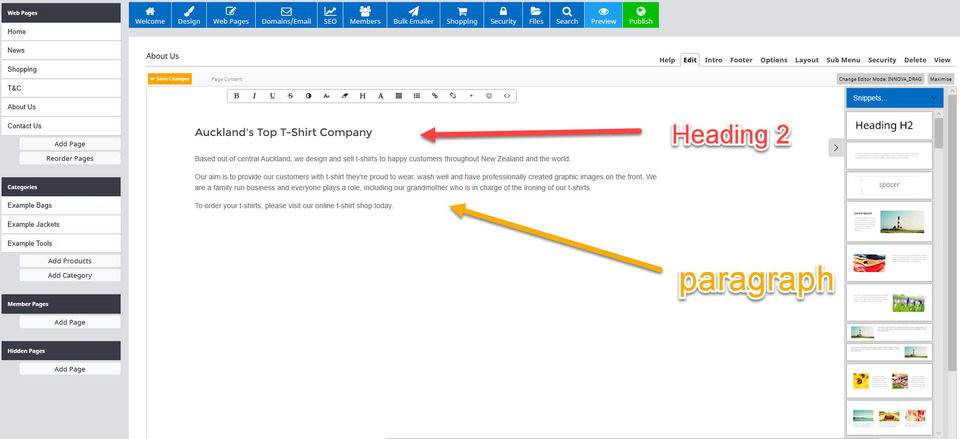
As the About Us page is open, we can add sub headings and paragraph text. You can do this either by clicking inside the paragraph text box which is already in the middle of the page by default, or by selecting a snippet from the right hand side column which contains the type of text you would like.
Here is a link to the text we used, which you can download and copy and paste (Ctrl V) into your trial site if required.
Right click and select Save As to download About page text
We added some text to the existing paragraph snippet box, and then clicked on and dragged over the Heading H2 snippet box above it. We then added a title to that heading snippet, as in this image:
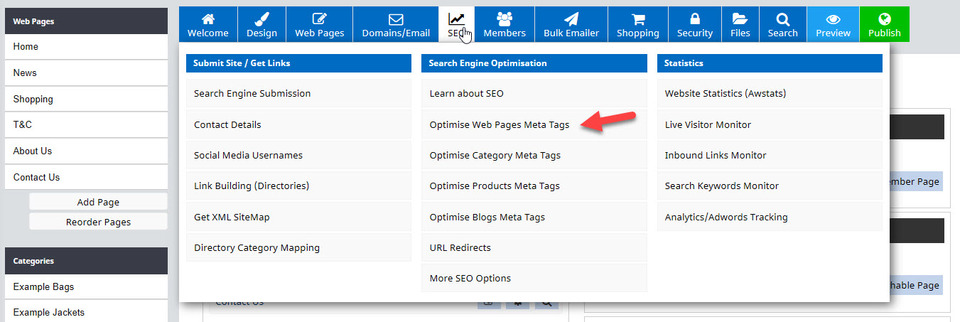
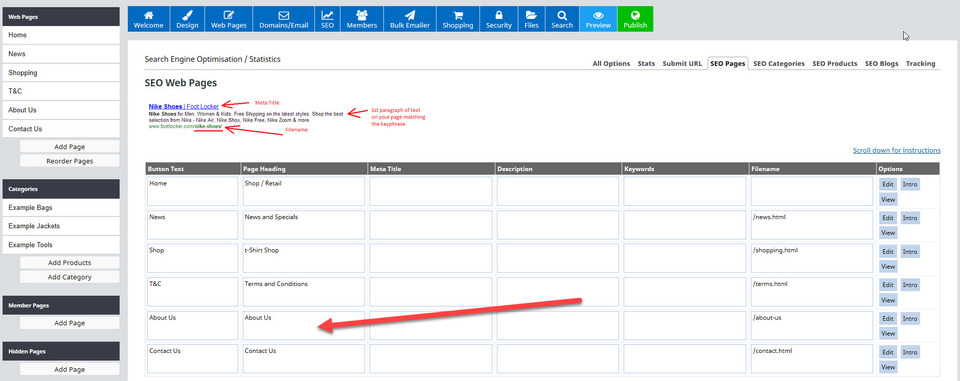
This will then open a page from where you can edit your SEO meta tags, including your page title (page heading). We will leave it as About Us for now.
Upload and Add an Image to a Web Page
Open up your About Us page again by clicking on it's title which can be found in the column under Web Pages on the left hand side of the screen.
Right click on this link and select Save As to download the image we used below.
There are two ways you can add an image to a page. The one you use will depend on the image itself you want to insert.
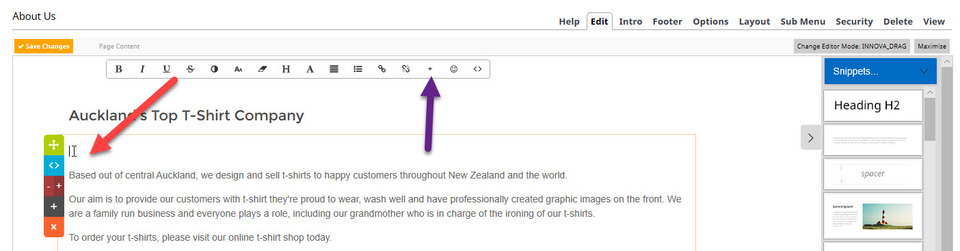
- To insert an image into an existing text block, position your cursor where you want the image to go (red arrow), then click the + sign in the editing bar (purple arrow). - Note that if you position your cursor next to any text, it will alter the position of the text. If you want to have the image beside text, you are best to use a snippet box -This opens up a box asking what you want to insert (image. link or form field), so choose Insert Image. To upload an image from your device, click the browse button to open up your image files on your device and double click on the image (jpeg file is best) and then click the blue Upload button.
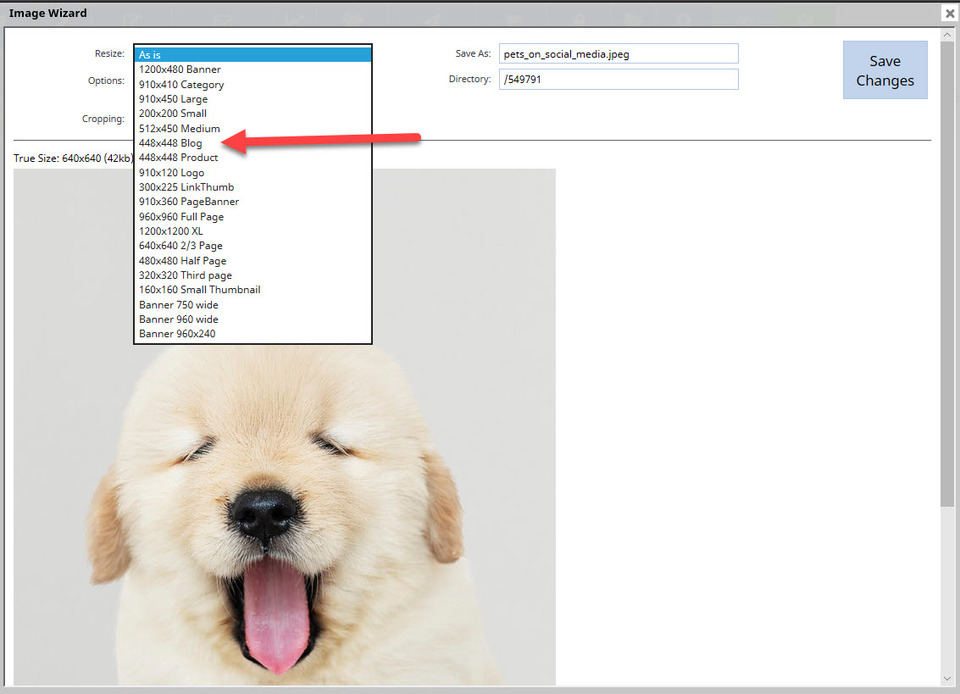
The Image Wizard in the CMS will open your image ready for editing, if required. It will show you the true size of your image as it is now, the existing file name it has and some options to crop, rotate, resize and convert to JPG. We are going to resize this image to fit on the About Us page. Click on the drop down arrow for the Resize box, and select the image size 448x448 Blog option. Change the file name if required, then click Save Changes.
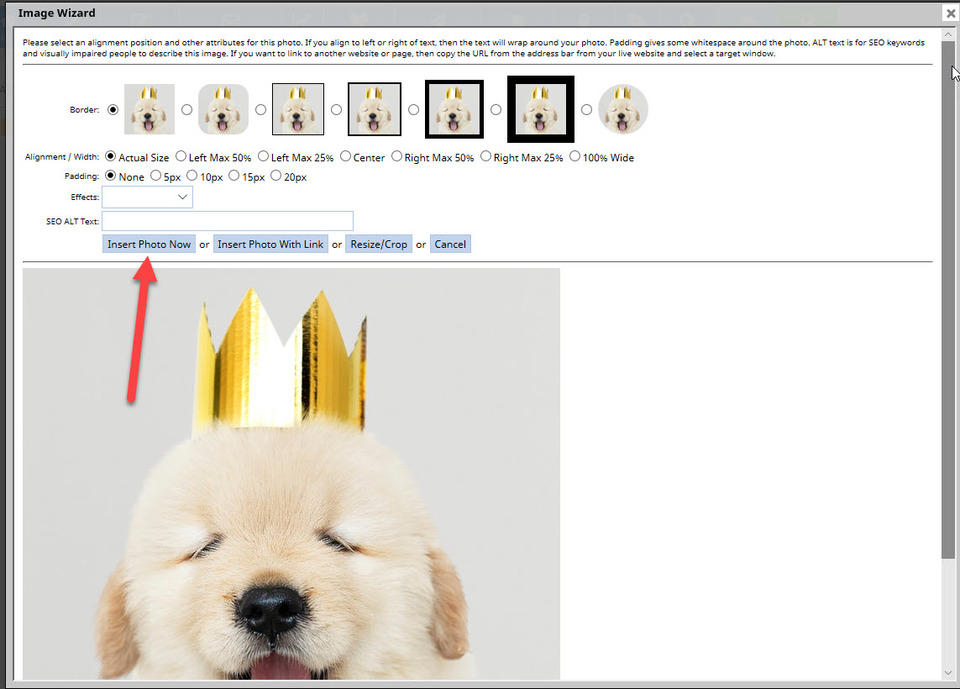
Another box will open which allows you some editing options for your image, including its position, border and padding around the image. For this example, we will go with the default border, alignment and padding, and then click the blue Insert Photo Now button.
Your About Us page will now look like this from the CMS editing area:

We will cover further image editing skills in later course sections.
Adding a Logo to Your Website
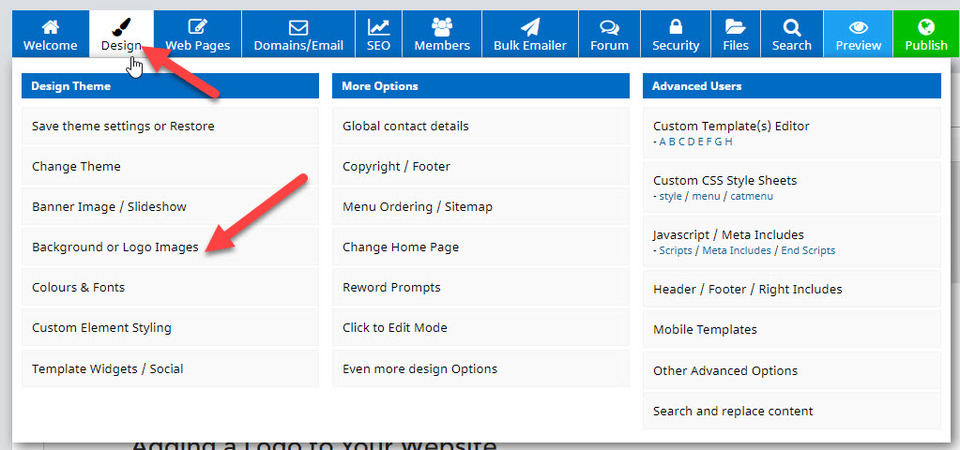
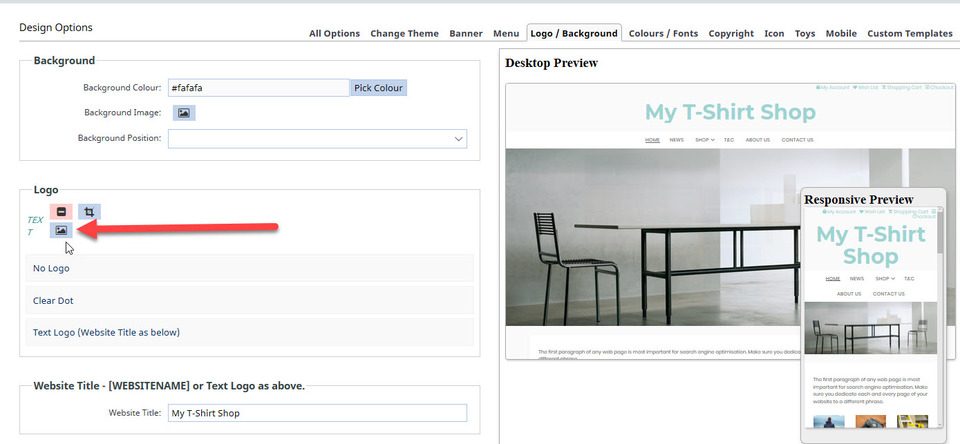
One of the best ways of branding your website is to add your business logo to it. Hover over the Design option button on the menu, then choose the Background or Logo Images option.
Right click on this link and select Save As to download the logo we used.
Under the Design Options page which opens up, you'll see that the Text Logo (website name) is being shown by default. We're going to replace this with a logo image. Click the image icon (change image) to add your logo.
Once again you will be taken to the Image Wizard where you are able to browse and then upload an image from your device (it's best if your logo is already the size it needs to be, which is 910x120px). This time, select the logo option from the Resize drop down - 910x120 Logo. Your logo will be automatically placed where the website name text was, above the menu. Press Publish to save your work so far.
You have completed Section 1 of the Beginners Course. Well done! It's now time to move onto Beginners Section 2.