Welcome to Section 2 of the Beginner's Website World Training Course.
By the end of this section, you will be able to:
- Create an animated banner
- Add overlay text to an animated banner
Creating an Animated Banner
To create an animated banner, you first need to have at least two static banners created. This can be done by a graphic designer, or for the purpose of this course, you can create one in Canva for free. The size of your banner will vary depending on the website template you have chosen. The example site we are building for this course is using the Decor Theme template which is sized 1200x480px.
Here are the banners we used, which you too can download and use if you choose (right click and select Save As on each link):
Select the Design button, then choose the Banner Image/Slideshow option. You will see that there are already four banners by default - one main banner and three animated banners. All four are currently on a scrolling pattern, which shows each banner for a set number of sections before moving onto the next.
For this course section, we are only going to have three banners, so we can remove one of the banners under the animated title by clicking on the red icon box, then saving your work so far by clicking the Publish button.
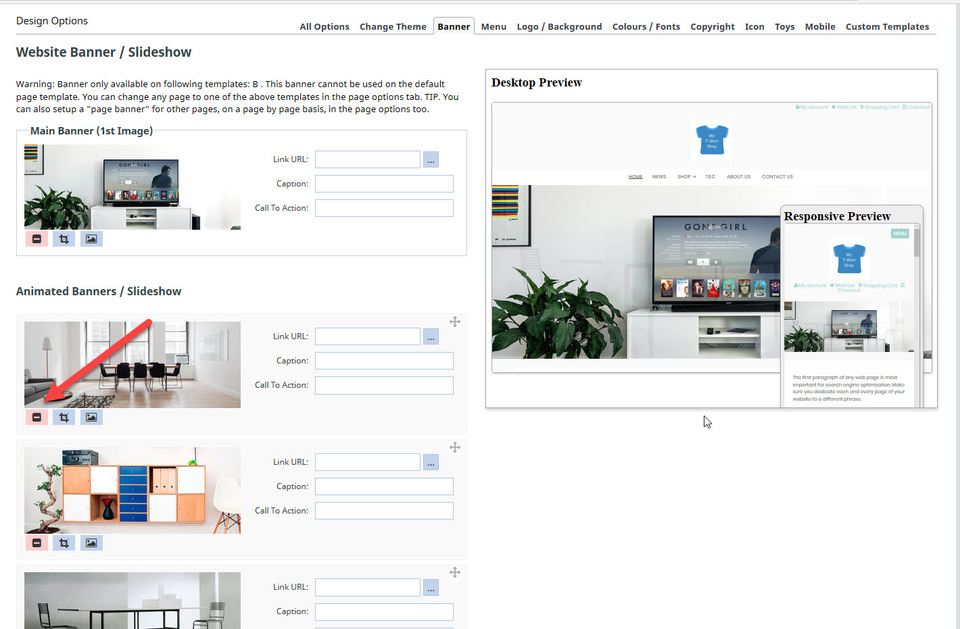
Now you can replace the remaining three default banners with three of your own. To do this, click on the image icon underneath each banner. This will open up the Image Wizard where you can once more browse and then upload the image from your device. Complete this for all three banner uploads.
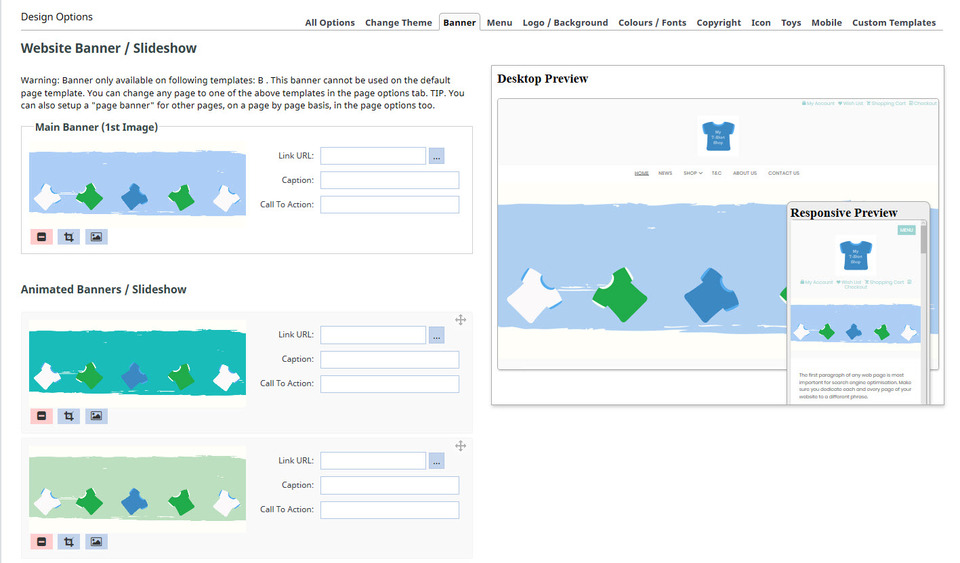
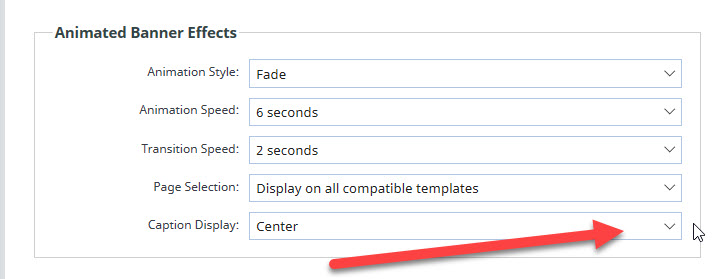
Scroll down the page further and you will see a box where you can edit the default animated banner effects. Here you can pick from the animation style and speed, the transition speed between slides, where the banner displays and the position of any captions you want on the banner(s). For this course, we will select the Caption Display option Center, leaving the other options as default.
Adding Captions to Your Animated Banners
Scroll back up the page to where you can view all three of your banners again. Next to each banner, you will see three boxes: Link URL, Caption and Call to Action. It is here where you enter the text to display on each individual banner.
The Link URL we will use will remain the same for each banner. You can find the right link by clicking the blue square containing three dots. This will open up the URL Wizard where you can find a page on your trial site, or copy and paste a URL into the box down the bottom. For this example, we will click on the Link to a page on this site option, then choose the Shop page.
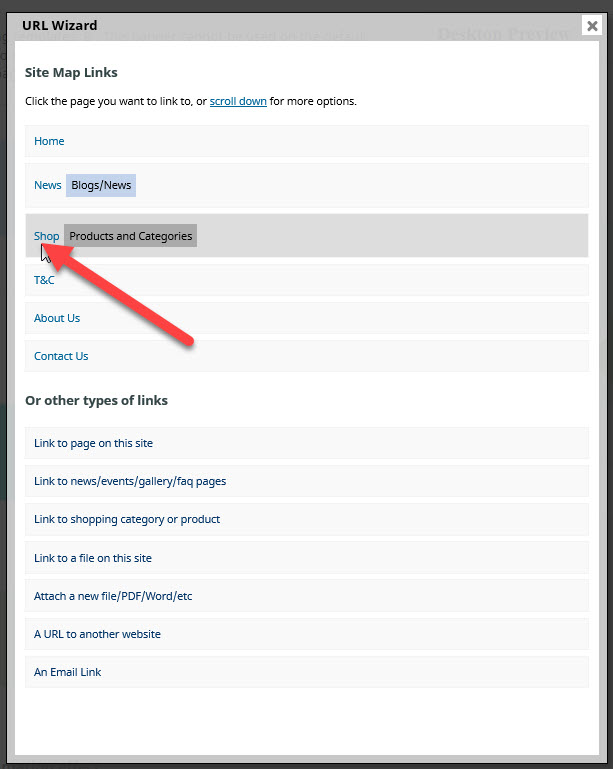
The Link URL will then show in the box next to the banner. Repeat this step for the remaining two banners.
Next we will add a Caption and a Call to Action for all three banners. A caption is a short catchy piece of information about something on your website, or your business. A call to action tells the visitor to your website what to do next. Here is what we added:
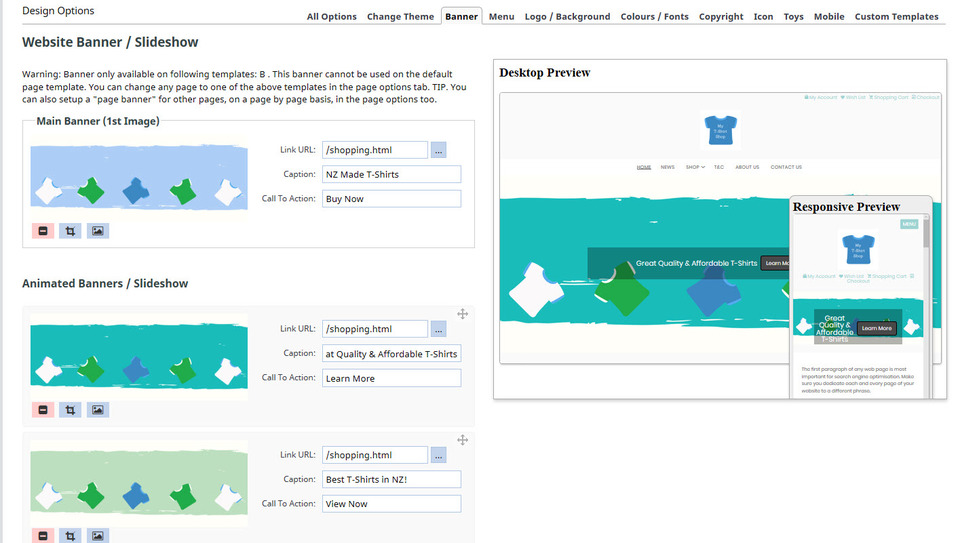
Notice that on the Desktop Preview, you can see the text overlay in the light grey box, and the call to action in a smaller dark grey box within it. This is now a clickable link for your website visitors.
You have now completed Section 2 of the Beginner Level Course. Well done! It's time to move to the next one: Beginners Section 3.