Replies to customers from within the CMS can make use of pre-set response blocks that can be appended to the email body.
These are created and managed in the messaging area when replying the the enquiry.
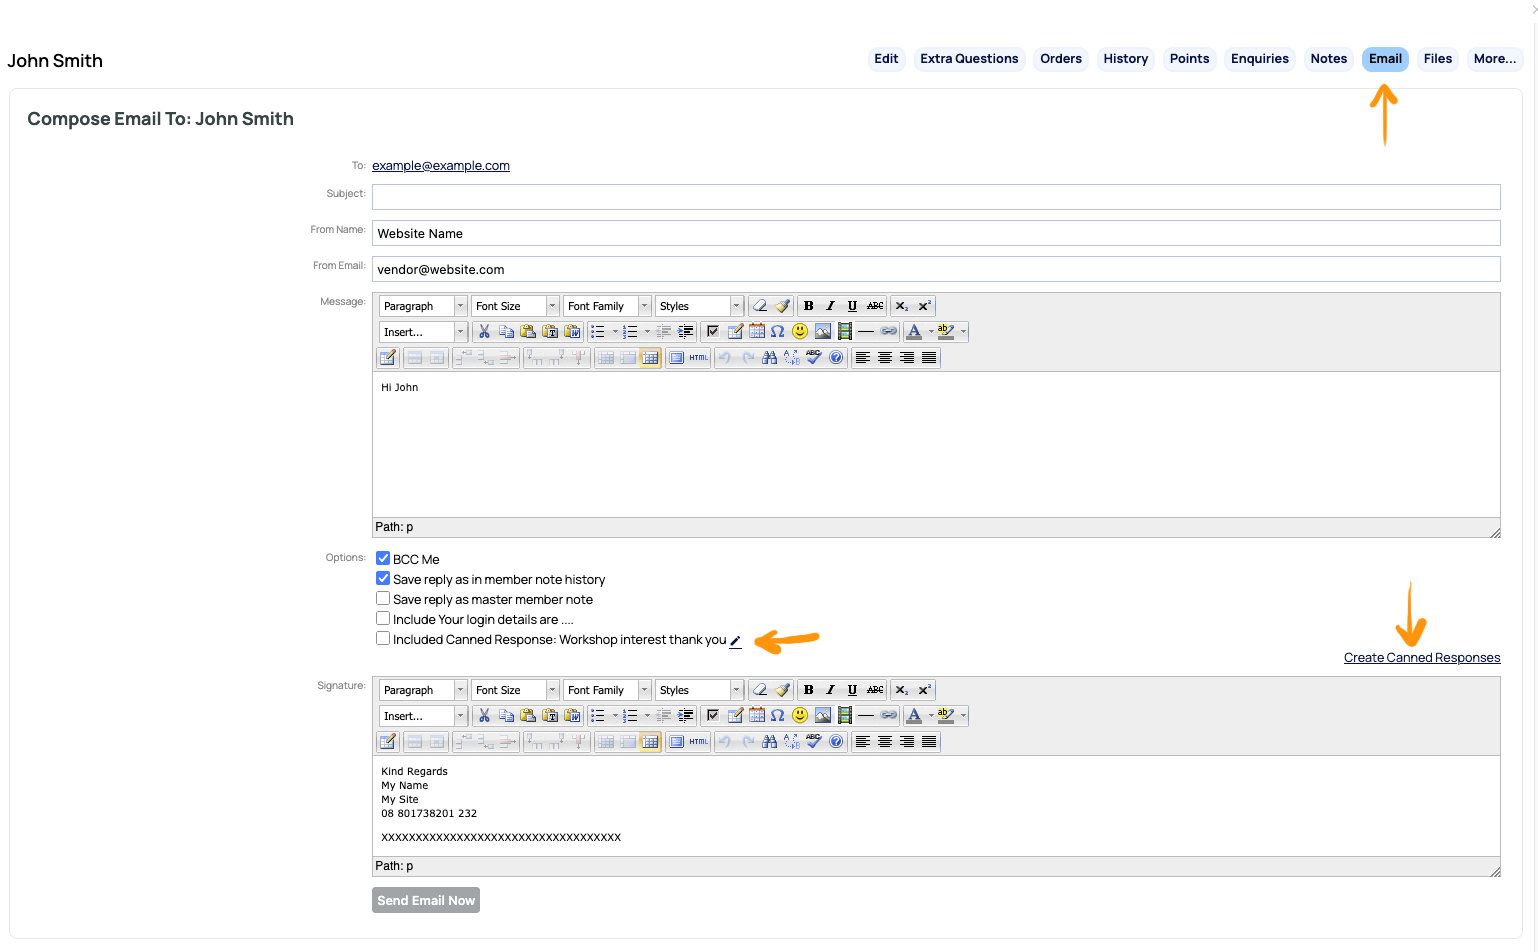
The link to create a canned response is found in the bottom right of the message area.
The same link can be used to edit or delete your responses.
Any responses added are found at the bottom left of the message area, enabled by a check box.
Replying to a Member Registration using a canned response
To reply to a member registration with a custom message and password information.
- View the member record for the registrant, via the MEMBERS area, then click the EMAIL button top-right.
- This will give you the option to create a custom message via the MESSAGE area.
- You can create a canned response that will appear under any custom message via the CREATE CANNED RESPONSE option bottom right.
- You can assign a canned response via the checkbox option in the OPTIONS area, once created.
- You can choose to provide login details via the YOUR LOGIN DETAILS are.
- You can also save and add a custom signature via the SIGNATURE option at the base of the page.
Replying to a Website Enquiry using a canned response
To reply to an enquiry with a custom message and password information.
- View the enquiry via the ENQUIRIES section, then view the message and choose REPLY.
- This will give you the option to create a custom message via the MESSAGE area.
- You can create a canned response that will appear under any custom message via the CREATE CANNED RESPONSE option bottom right.
- You can assign a canned response via the checkbox option in the OPTIONS area, once created.
- You can choose to provide login details via the YOUR LOGIN DETAILS are.
- You can also mark the enquiry as completed, plus other options.
- You can also save and add a custom signature via the SIGNATURE option at the base of the page.
Email Content Sequence
The content of the sent email will be shown on screen when it is sent.
The order of the content is:
- Custom Message
- Canned Response Message
- Login Details
- Signature.
More From This Section
Learn about our affiliate management system here
By default, custom checkout fields appear in an unsorted order when appearing on invoices. You are able to force the order using the following hidden field.
Understand the stock management process deeply for fast selling items.
You can view the history of automated emails sent to a customer or for an order.
Learn about importing products from CSV
You can export Product data from your shopping cart in CSV format.
You can specify 6 extra product fields that will appear as filter options in the advanced search option.
You can add enquiry forms to your product pages with a click of a button
The content management system logs product enquiries in multiple areas
Within the Enquiries / CRM section of the CMS you can create pre-set responses to be inserted into your replies.
You can now add products to a closed order.
You can now create orders via an Excel spreadsheet upload.
Before you can issue a refund, you need to issue the credits. Either a discount, or a stock item return...
You can add vendor-only pages to allow members to upload and manage their own products a view orders
Learn more about how to setup an art gallery with exhibitions and artists
You can either set specifications via the More Text > Specifications area or via a Custom table format
You can create Gift Packs or Recipe products which will track stock for individual items sold
Prevent checkout continuing, until customer has added enough items to their cart to match the required threshold.
Custom calcs is an optional plugin that can be used to calculate a complex manufacturing cost, using all sorts of interesting formulas.
Sample of rep setup for internal use.
Using the p_minLevelForSee column you can restrict who can view the products imported.
By default, the system uses the product title as alt text for the main product images. However you can over ride the text on additional product images.
FAQ Topics
Building your site
Advanced Page Types
E-Commerce
- Shopping Basics
- Product Pricing, Currencies
- Category Management
- Products
- Product Options
- Layout and Formatting
- Payment Options
- Freight - Couriers
- Processing Orders
- Orders / Invoices
- Advanced Ecommerce
- Plugins
- Wholesale
- Bookings Management System
- Stock & Quantities
- Vouchers, Discounts, Loyalty Points
- Selling Photos / Prints
- Shopping Cart Add-on Page types
- Advanced APIs / Add ons
- Point of Sale (POS)
- Reports
Email & Membership
Promoting your site
Advanced
- Power User Options
- Form Spam Filtering
- Wordpress
- PHP Setup
- [TAGS]
- jQuery snippets
- Search External Links / Import external content
- HTML / CSS Snippets
- Embedding Web Fonts
- Loading additional Material Symbols styles
- FAQ Help Map
- Uploading local font files
- Advanced Template Customisation, CSS, etc
- Languages and Translations
- Importing Content from Another Platform