When you login to the content management system you will find a lot of different buttons and editor options. Find our more about what each one does.
ACCOUNTS BAR (top right)
Contains help links, account information, the GO LIVE button and a dropdown to allow you to switch websites.
MAIN TOOLBAR
This menu contains the main options for editing your website, changing design elements, accessing E-Commerce etc.
DASHBOARD/EDITOR
The main area of the CMS for changing content and settings.

Detailed Information
The Accounts Bar (top)
Contains account information and help

Help
Access the CMS Help website (which you are on currently), or send a support ticket.
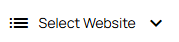
Select Website
If you have more than website under your accounts, this allows you to move between them.
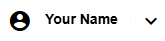
Your Name
Account Options, Security and Logout Button

Preview
Preview your full website in a new browser.

Go Live (with your website)
Start the process to make your website live, by organising the domain name, confirming email address, choosing hosting plan and paying first month in advance.

Publish
Publish your recent changes so you will see these on your live site, or cement filenames and links.
The Main Toolbar (Left)

Welcome Section
View system messages, check usage, account summary

E-Commerce (if you have an e-commerce page added)
Create and manage products, categories, bookings, payment options, vouchers and freight.

Products
Quick link to products if you have an e-commerce page

Orders
Quick link to orders if you have an e-commerce page

Reviews
Quick link to your reviews if you have a reviews plugin enabled.

Enquiries
View messages submitted through contact forms on your site.

Managing Members
Manage your website members, download reports and more

Bookings
Quick link to your bookings if you have an appointment page.

Events
Quick link to your events if you have an events page.

Managing Web Pages
Edit your page content here. Add, rename, move, remove pages etc

Design Template, colours
Change your template style, font colours and advanced web design functions.

Managing Domains and Email
Search, setup or transfer existing domain names. Manage your email settings, accounts.

Search Engines and SEO
Submit your website to Google, Bing and more, Optimise for SEO (Search Engine Optimisation), check visitor statistics, enter advanced tracking codes.

Bulk Emailer
Create and send newsletters, campaigns and other bulk emails to your members.

Search
Search your whole site. Search and replace words. Product search only is available in the products tab.

Files and FTP
Manage all your website files, images, PDFs. Find FTP settings, instructions.

Security
Manage passwords, additional website administrators, site-wide passwords

Settings
Manage Global Contact Details, API Data.
Edit Page Options (otherwise known as the LITTLE TABS ON THE TOP RIGHT)
When you choose to edit a page, a series of shortcuts to various options will appear on the right hand side of the editor, sitting below the accounts bar.
The tabs are the quickest way to navigate around the different options available for any given page type.

e.g. Top Level EDIT PAGE Options
- Edit - Will take you to the main editor window for adding text and images
- Intro - An additional content area for adding text and images. Appears above content added in the mainEDIT window
- Footer - An additional content area for adding text and images. Appears below content added in the main EDIT window
- Options - A shortcut to the page options. Change the template used for the page, add a captcha or inquiry form, where contact forms get sent etc.
- Layout - A shortcut to the change layout options area for the page. You can change the page layout to another, similar page type.
- Sub Menu - Navigate your sub menu or add a new page to it.
- Security - Security options for the page, show only to certain site members, set administrators for the page etc
- Delete - Delete the page
- View - Opens a preview of the current page in a pop-up window.
More From This Section
FAQ Topics
Building your site
Advanced Page Types
E-Commerce
- Shopping Basics
- Product Pricing, Currencies
- Category Management
- Products
- Product Options
- Layout and Formatting
- Payment Options
- Freight - Couriers
- Processing Orders
- Orders / Invoices
- Advanced Ecommerce
- Plugins
- Wholesale
- Bookings Management System
- Stock & Quantities
- Vouchers, Discounts, Loyalty Points
- Selling Photos / Prints
- Shopping Cart Add-on Page types
- Advanced APIs / Add ons
- Point of Sale (POS)
- Reports
Email & Membership
Promoting your site
Advanced
- Power User Options
- Form Spam Filtering
- Wordpress
- PHP Setup
- [TAGS]
- jQuery snippets
- Search External Links / Import external content
- HTML / CSS Snippets
- Embedding Web Fonts
- Loading additional Material Symbols styles
- FAQ Help Map
- Uploading local font files
- Advanced Template Customisation, CSS, etc
- Languages and Translations
- Importing Content from Another Platform