Images such as graphics and photos are fantastic tools to use on your website. But you need to remember that with most websites measuring around 800px by 1200px, your images need to be relative to it's size. Images offer many benefits to a website, including:
- making a website look appealing, so visitors stay longer
- helping your products or services be remembered
- showing your products in use & explain how they work
- creating a solid online presence for your brand
There are some downsides to images, one being that they can slow down the loading of your website. While our servers are quick and will provide your visitors with fast loading pages, it's still important you optimise all of the images you use on your website.
Optimising Your Website Images
Optimising an image simply means saving it in a web friendly format and an image of a suitable file size. There are two file formats you can use for your website:
- JPEG - this is best for photos
- PNG - this is best for logos and images created by a graphic designer
When you save your images, you can choose which file type it is by right clicking in the drop down box where you enter the filename. It's a good idea to give an image a meaningful file name, such as bluebabybib.jpeg not 343232.jpeg as it helps with your website SEO as search engines can 'read' text, not images.
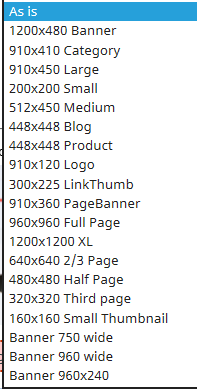
In our CMS, we have two image sizes (what you see on your screen):
- the original size of the image you uploaded, which may be reduced depending on the template you are using and where the image is going. Here are the standard image sizes we use:
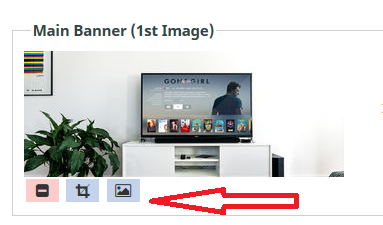
- You can drag a photo into your CMS wherever you see the image icon. The image will them automatically upload your image. Or you could click on the image icon to have access to additional controls over how your image looks, such as cropping and rotating.
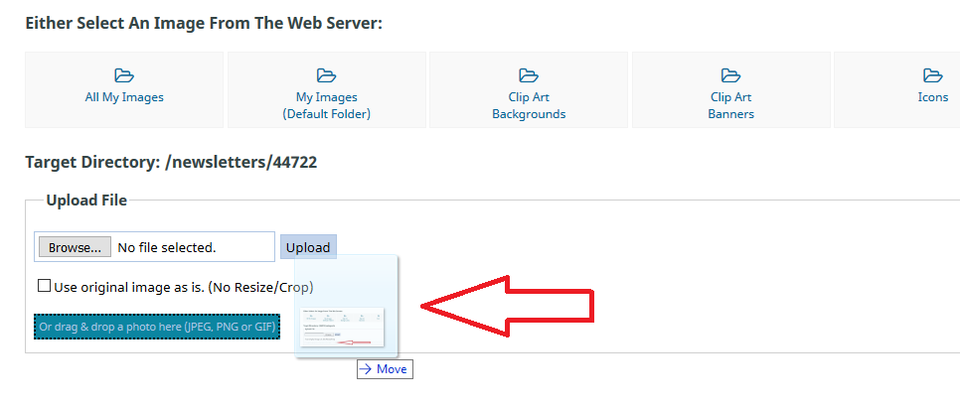
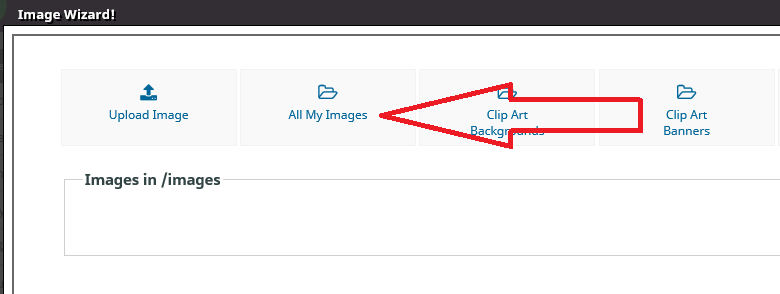
- You can use an image you have previously uploaded. It will be found in the Image Wizard, under the tab All My Images.
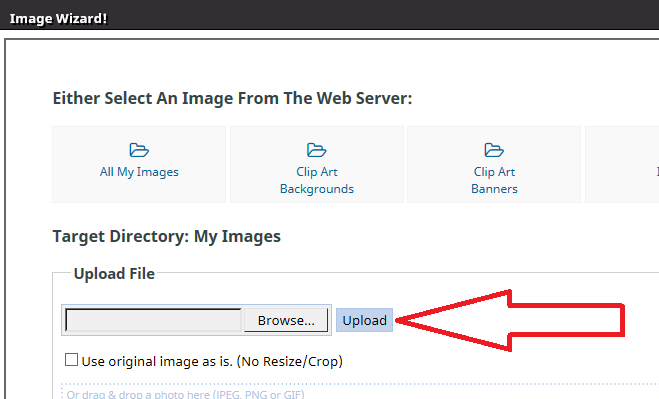
- Using the Image Wizard, you can upload a new image file using Upload File. Simply choose the Browse button and it will open access to your computer files, from where you can select an image. Click on the image and then back in the CMS, click on Upload. You are then given the option of editing your image and how you would like it to appear on your website, depending on where you are uploading it.
- In the Image Wizard, you can copy an image which is hosted on another website. Using the Firefox browser, simply right click on the image you want and select the option which says Copy Image Location. Then paste that image URL into the Import Image box. You can also enter the URL of the page the image is on, but this may upload every image on that page.

It's important to remember though that you should be optimising your images before uploading them.
Posted: Thursday 19 April 2018