
Learn how to make a website using our free website builder, and in hours, not weeks! With free shopping cart and POS software, web design wizards and built in bulk emailer, we offer an all in one website service, with no hidden costs.
5 Steps to Make a Website
There are five simple steps to make a website with us:
- Sign up for a free trial
- Add, remove and rename pages
- Add content
- Design your website
- Go live
1. Sign Up for a Free 30 Day Trial
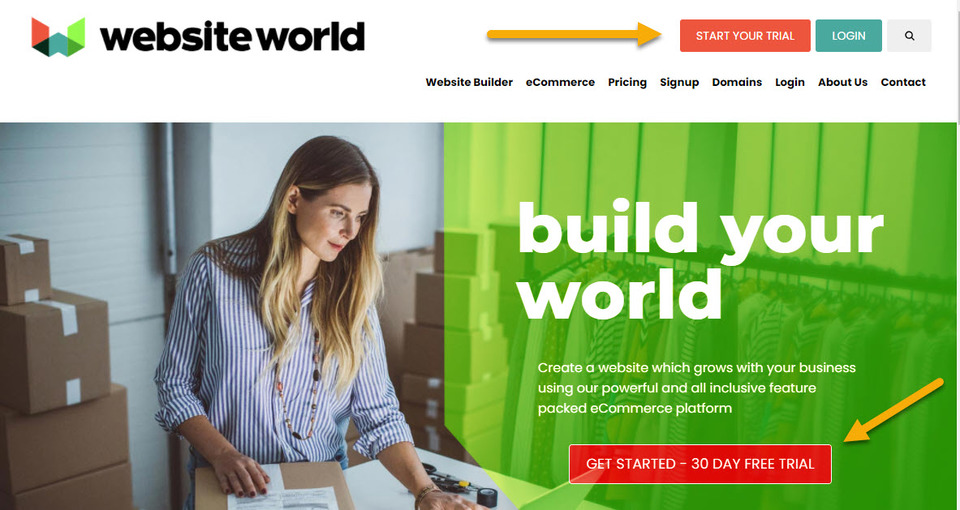
- Clicking upon the Start Your Trial button
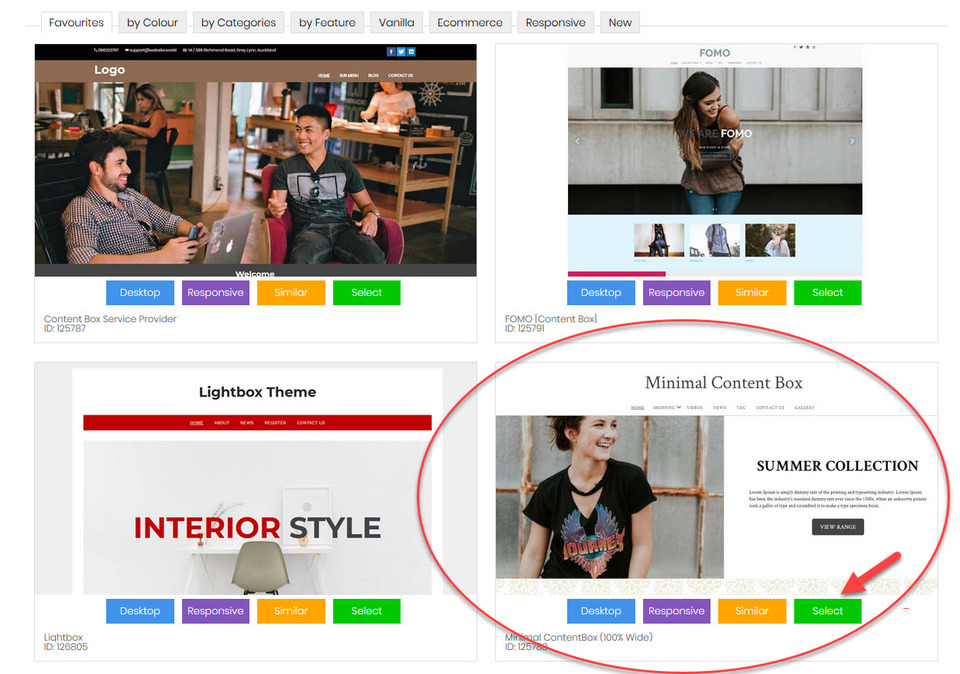
- Selecting a web design template from our continually growing range of pre-designed templates for service and product based businesses. This template can be easily changed later. In this example, we are using the website template Minimal ContentBox (100% Wide) as a demonstration website.
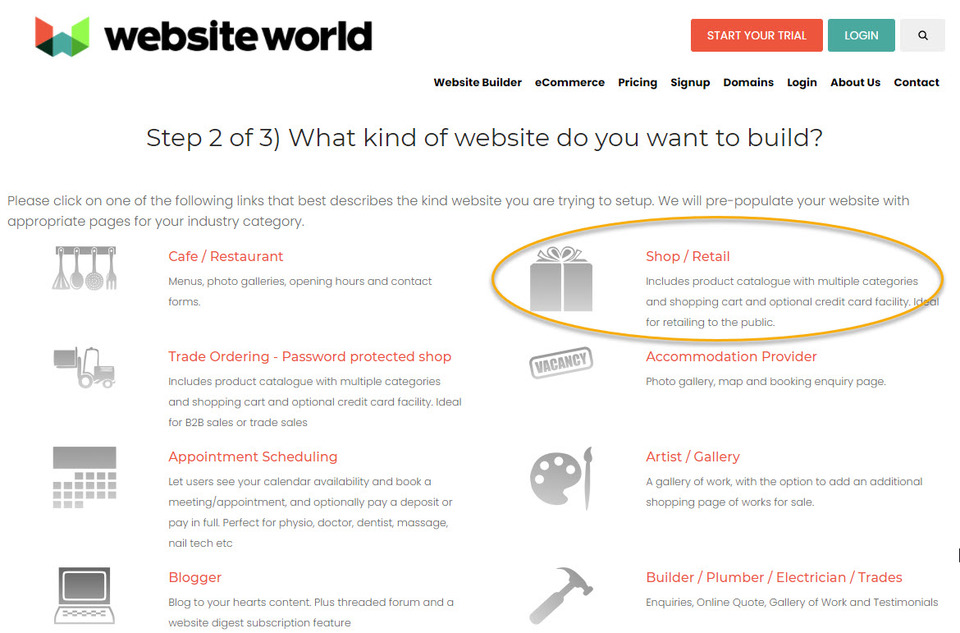
- Select the type of website you want to build, such as an online shop, a service provider, a blogger, real estate agent etc.This will let us pre-populate your website with the appropriate pages for your chosen industry. In this example, we are choosing the Shop/Retail eCommerce option which includes a built in shopping cart.
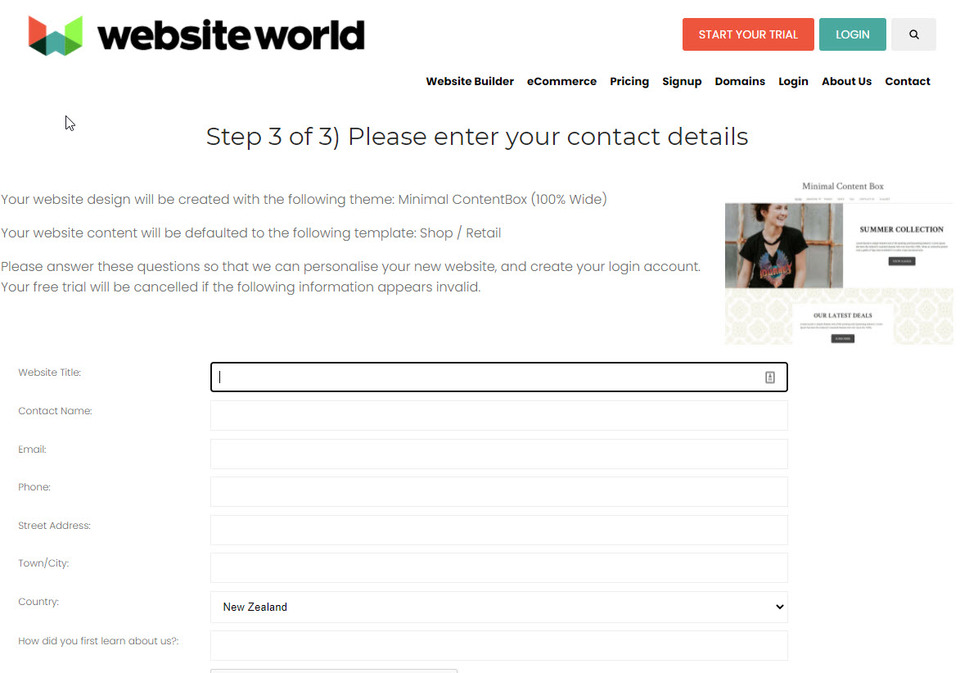
- Enter in your website name and contact details to start your free website trial.
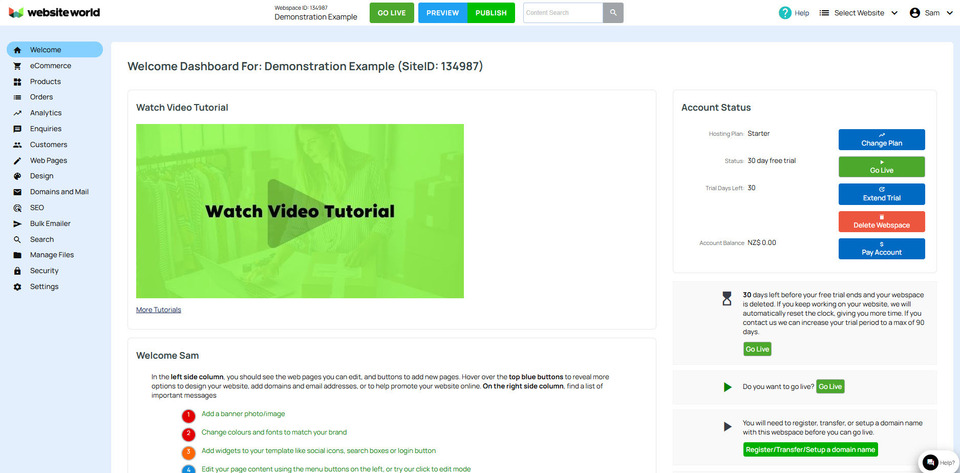
You will be sent an email which asks you to confirm your email address, and also contains information on how to login to your website, along with a temporary password. Once logged in, you will see the Welcome Dashboard which is where you have complete control of your new website.
2. Add, Remove Or Rename Pages On Your Website
Your new website will come pre-populated with pages which will vary according to the type of template you chose. It is easy to add or/and remove or rename these pages within your website.
- Adding New Pages
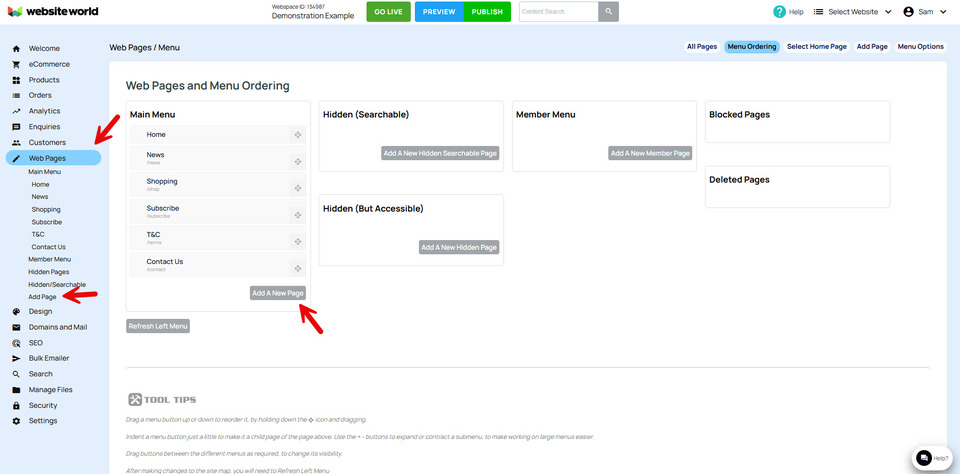
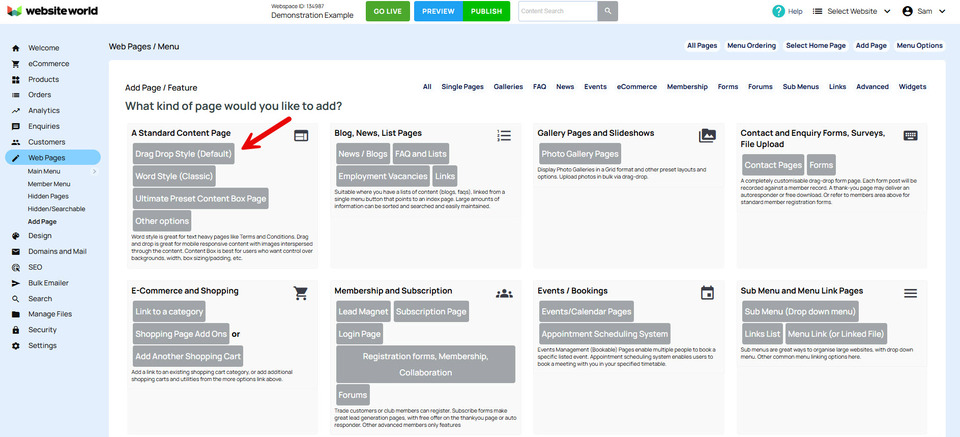
To add a new page to your website, click upon the Add Page button which can be found on the left hand side of the Welcome Dashboard, or by clicking on the Web Pages button and selecting Add Page.
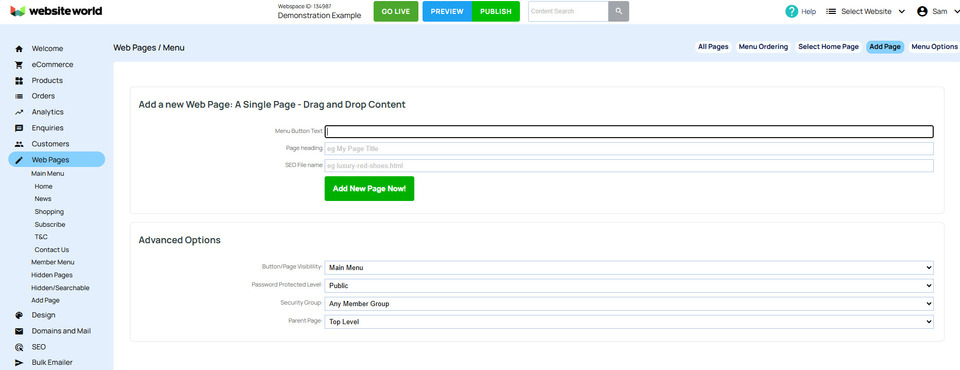
After clicking on the Add New Page Now! button, you will be directed to your new page. It will also be automatically added to your menu display on the left hand side of your screen, plus your menu bar on your website.
Deleting and completely removing a page from a website when it is not something we recommend due to SEO reasons. You should instead change the visibility of the page to block it from being found and viewed, plus remove it from the menu. If you must delete it, be sure to redirect it's URL to a live page.
Hover over and click the Drag icon of the page you want to delete and drag it to the Deleted Pages box.
Renaming a page is also done via the individual page you wish to rename. The areas you need to edit are the button text, page heading and SEO filename. Be aware that once your website is live, you should not change any SEO filename as to do so creates broken links on your website, and search engines believe that as it has a new filename, it is a new page. You consquently lose any SEO benefits that page had. You can change your filenames without penalties if your site is still in trial mode however.
To save the changes you have made so far on your website, please click on the green Publish button. This will not make your site live, but will instead publish the changes to your trial site, saving them.
3 - Add Content to Your Website
There are two types of content you can add to your website: text and graphics/photos.
- Add Page Titles, Sub Headings & Paragraph Text to a Page
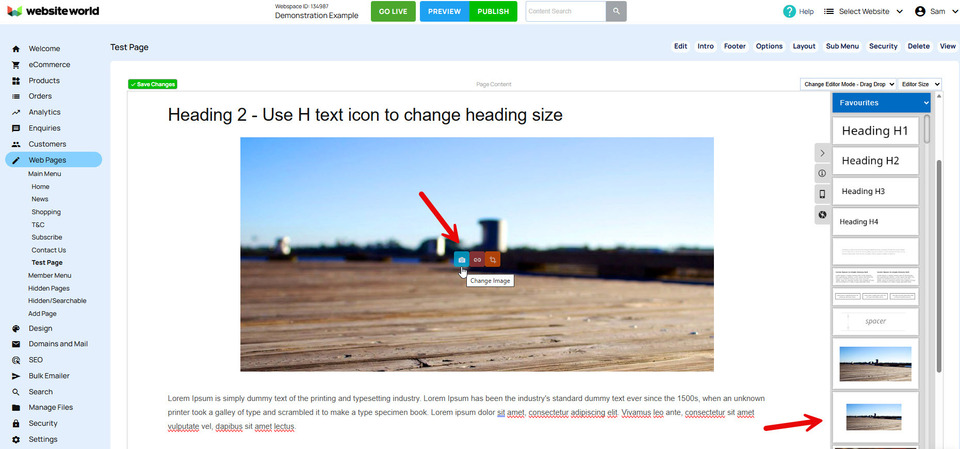
To edit a page to add titles, headings and paragraph text, click on the page name under the Web Pages tab on the left hand side of your screen. This will then open up the page to edit. In this example, we're going to edit the Test Page, as seen below, using the Drag and Drop Editor.
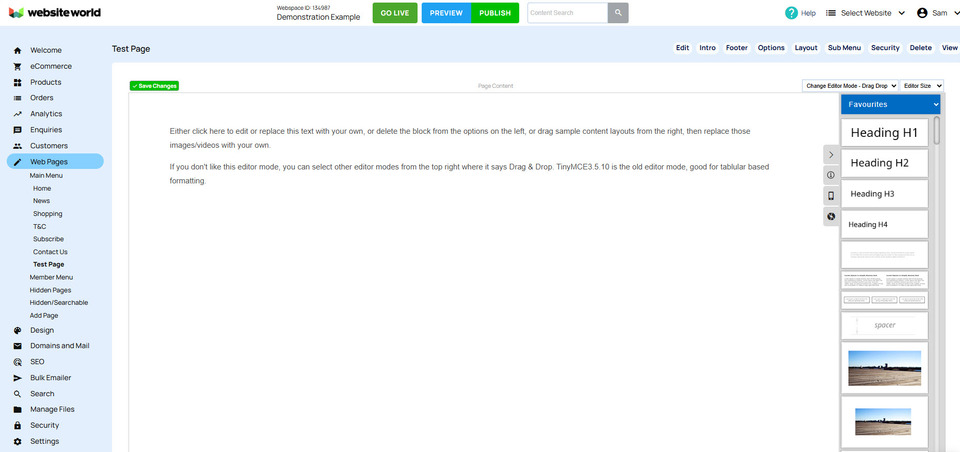
As this Test Page is open, we can add sub headings and paragraph text. You can do this either by clicking inside the paragraph text box which is already in the middle of the page by default, or by selecting a snippet from the right hand side column which contains the type of text you would like. You do not need to add another Heading H1 as by default, every page you create automatically has one.
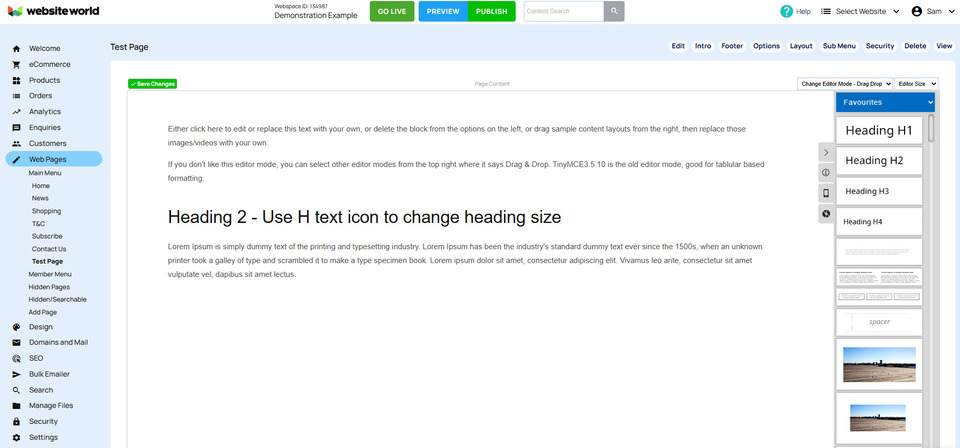
We added some text to the existing paragraph snippet box, and then clicked on and dragged over the Heading H2 snippet box above it. We then added a title to that heading snippet, as in this image:
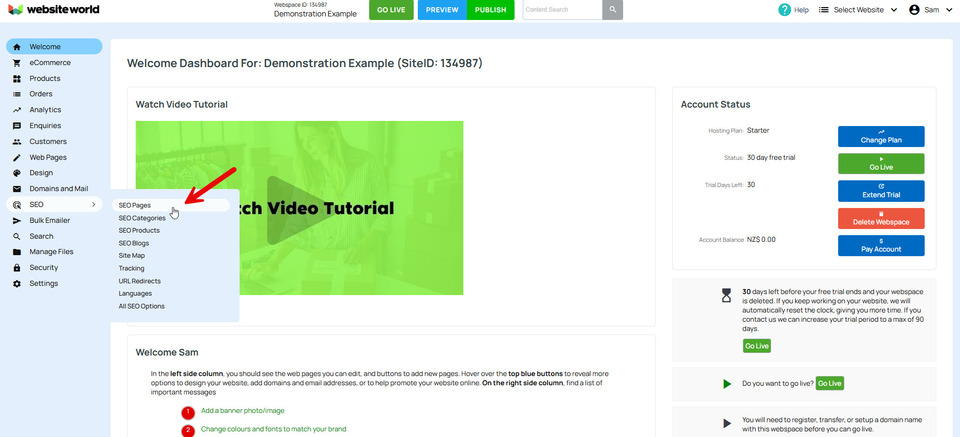
There are two ways you can change the page title, or Heading 1 (h1). First you can follow the instructions in the previous step of renaming a page. Or secondly, you can open the SEO tab from the blue menu, then select Optimise Web Pages Meta Tags.
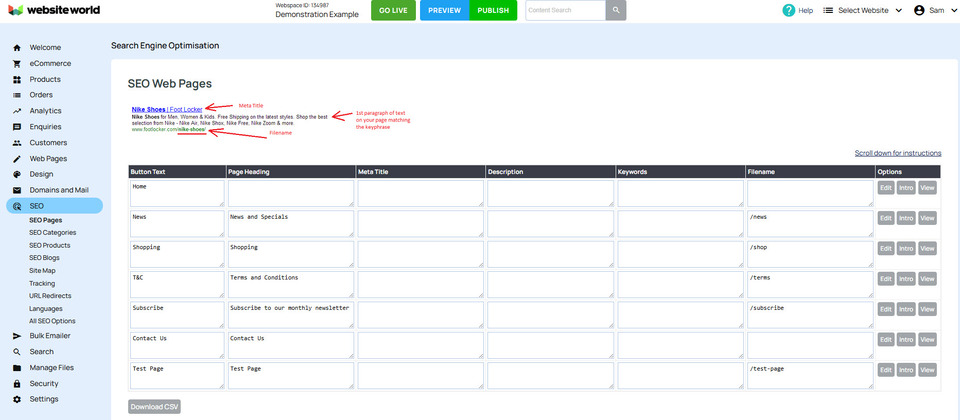
This will then open a page from where you can edit your SEO meta tags, including your page title (page heading).
- Upload and Add an Image to a Web Page
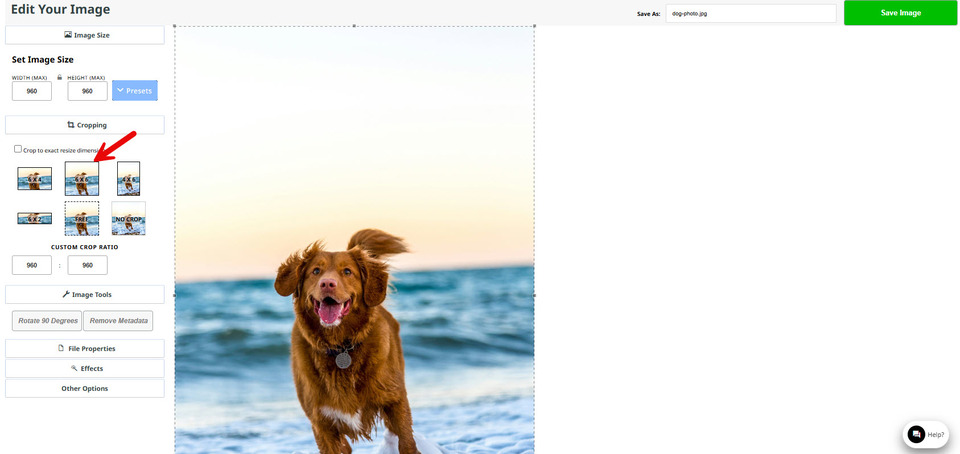
The Image Wizard in the CMS will open your image ready for editing, if required. It will show you the true size of your image as it is now, the existing file name it has and some options to crop, rotate, reshape and resize. We are going to resize this image to fit on the by selecting the 6x6 option. Here you can also change the file name if required, then click Save Changes.
4. Design Your Website
- Changing Your Font Type & Font Size
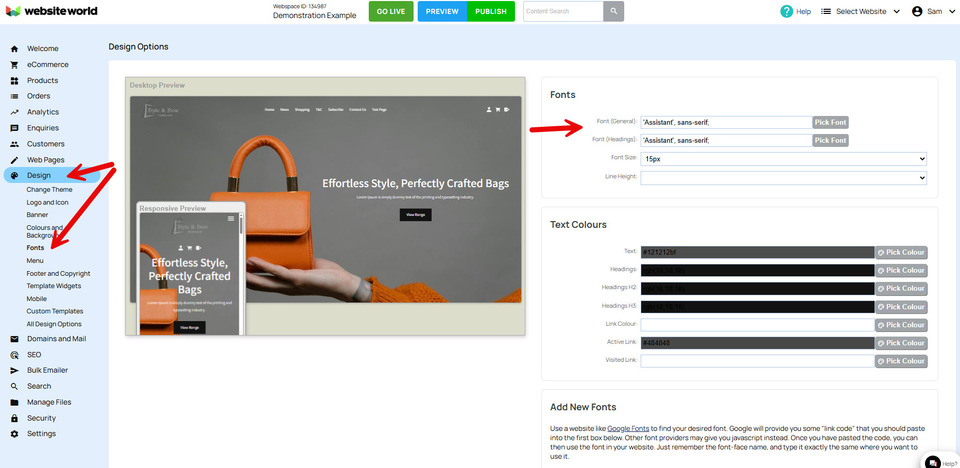
Changing your font type and size can be done through the Design option on the menu (for the entire website) or on each page (for individual pages).
To change the font throughout your website, on the Design menu, select Fonts.
- Changing the Font on a Specific Website Page
Highlight the text of you want to change the font, click the Font Family icon, then scroll down the list of fonts and click the one you want to use.
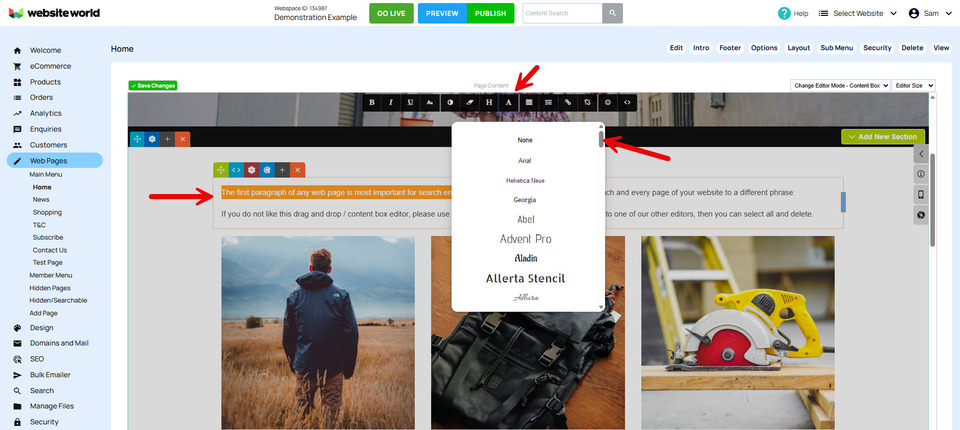
The highlighted text alone will change to this font, while the rest of the page remains the same. To change the size, highlight the specific text again and click on the Font Size icon, and select the size pt option you want.
- Changing Your Website's General Colours
Changing the general colours for your entire website is done via the Design Tab, then selecting the Colours and Fonts option. Once on the Design Options page, you will be able to edit the colours for many different areas on your website.
Colours are given a Hex code or colour number, making them more specific than simply being called 'dark blue' for instance. You can enter your hex code in the box next to the item you want to change colour for, and then click in another box to save it. Or you could click on the Pick Colour button and then manually choose a colour from the Colour Wizard and then select the Use Colour button.
Here are the colours we have chosen to use:
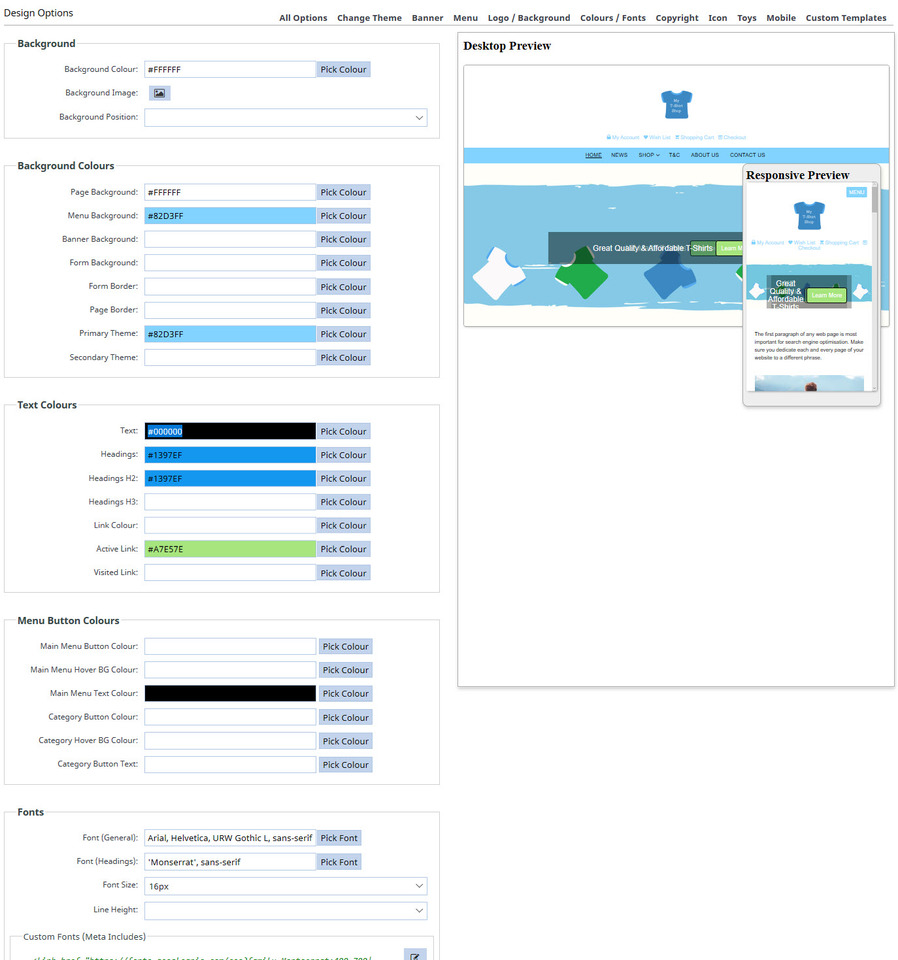
Save your work by clicking the Save Changes and then the Publish buttons.
- Changing Text Colour On Individual Web Pages
Highlight the heading and then select the drop down box next to the Text Colour icon. This will open up a pre-selected range of colours to choose from, as well as giving you and option for others by clicking on the More Colours option.
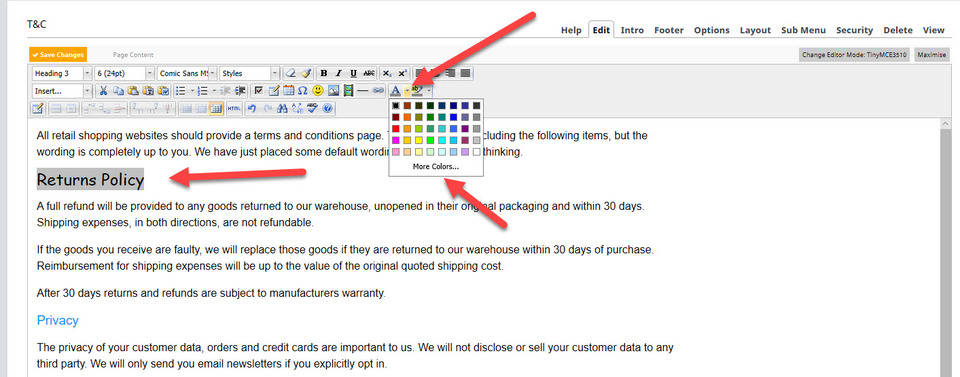
Click the Save Changes button and then the Publish button to save your work so far.
5 - Making Your Website Live
Once your website is live, you can continue to add new products, written content and images. A website is like a living thing, and is meant to change and grow. The only thing you should be wary of is deleting products or pages. Instead, these should be left live on your site, the products set to out of stock and hidden.
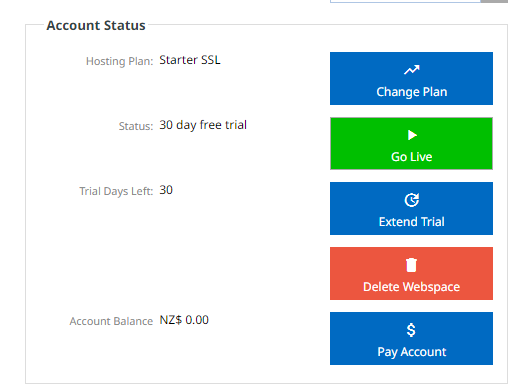
To make your website live, click the Go Live button, assign your domain name to it and pay your first month of web hosting in advance. It's a good idea to set up an automatically monthly payment for it, or for a discount, purchase it for one year in advance.
If you don't have a domain name yet, getting one is easy. Click on the blue Domains/Email button and then select the option Search and Register new domain. This will take you to a page where you can enter your chosen domain name and if it is available, purchase it. It will be added to your account and then you can assign it to your new website.
Our team here at Website World are here to help! Make sure you check out our Training and Tutorials for some great free help in creating and managing your website. Remember, the websites we host are SUPER FAST too!
