Welcome to Section 4 of the Beginner's Website World Training Course.
By the end of this section, you will be able to:
- add a new product to your shop (general stock item), including basic product description, price, product code and a main image
- set up variations for a product, including size and colour
- remove unwanted products from your shop
- add product categories
- set up freight/shipping fees
- set up currency and tax options
- set up payment options
Adding a New Product
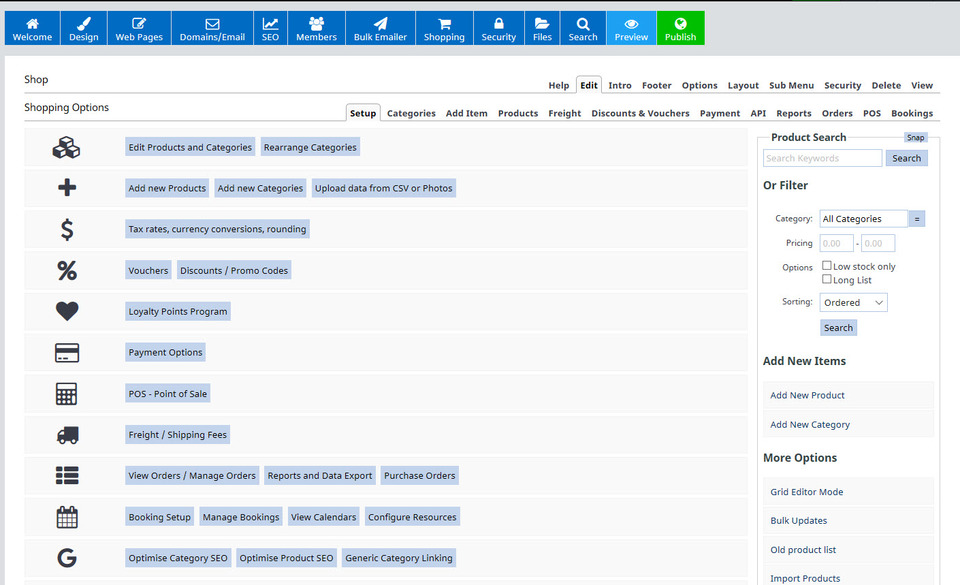
We will now be moving onto working with the shop or eCommerce section of your website. To add a new product, select the Shopping button from the main menu when logged in to the CMS. It is here that you will be able to find and edit all details regarding the shop section.
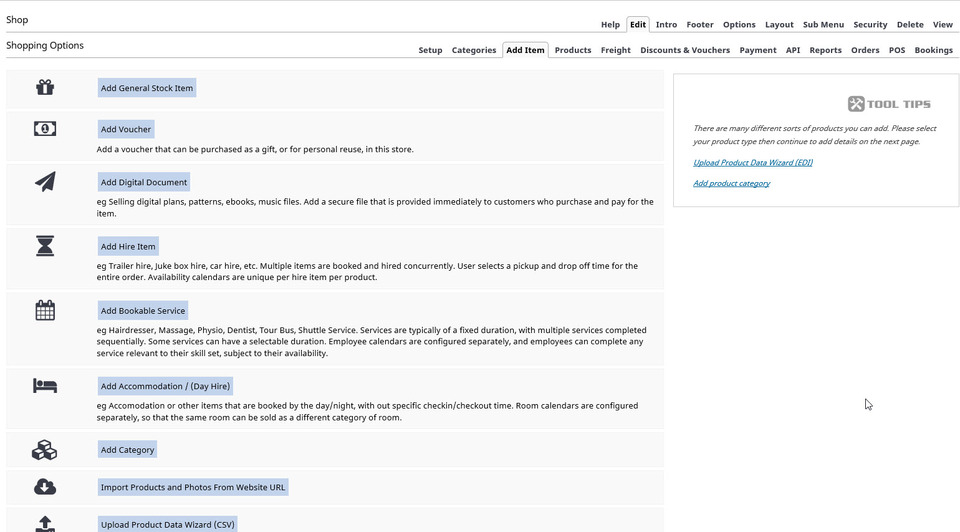
Click on the Add New Products button, and you will see the below screen, from which you can choose the type of product you wish to add.
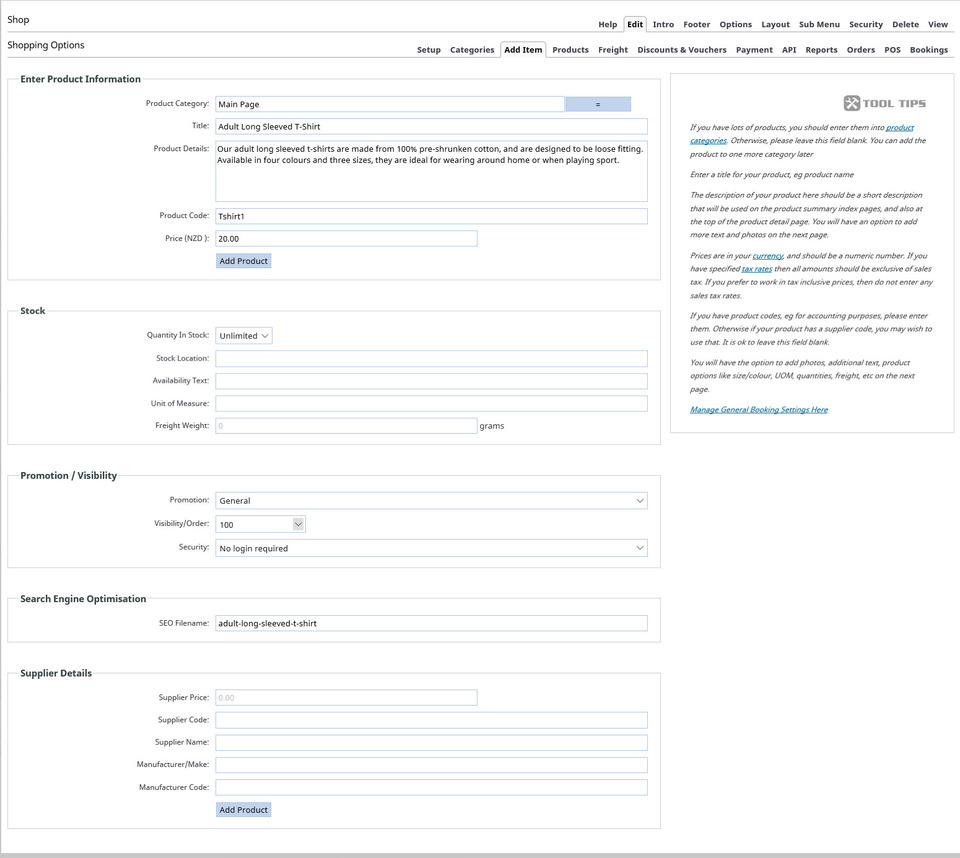
Click on the Add General Stock Item button, and you will open up a screen where you can enter the main details of the product. In this screenshot below, we have added example details to show you. We have left the Stock numbers, Promotion/Visibility and Supplier Details empty. The SEO file name we used is the same as the Title (adult-long-sleeved-t-shirt).
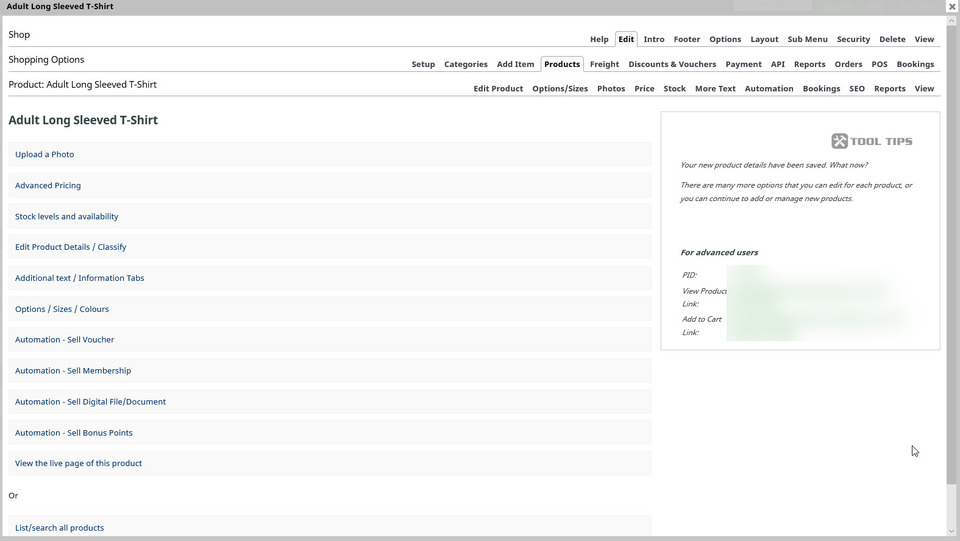
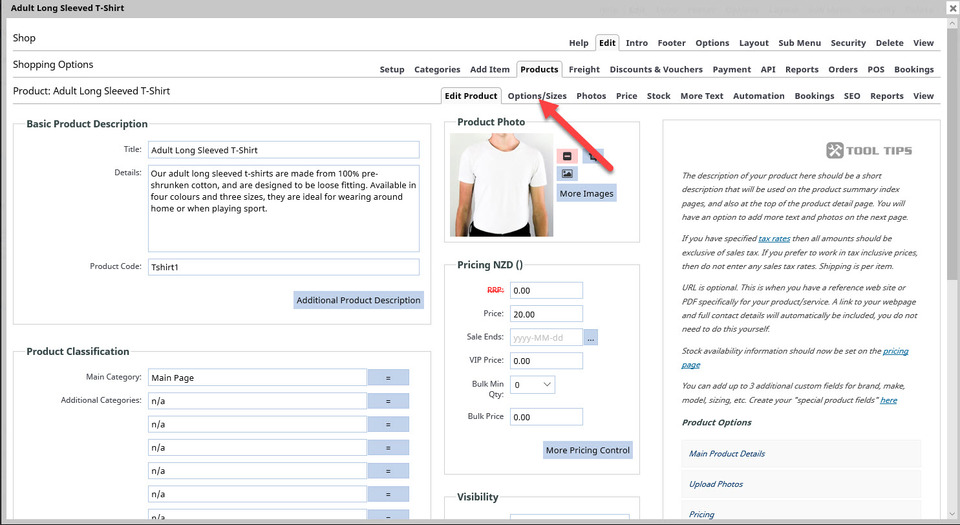
Click the Add Product button, and you will see a screen where you can edit specific details about this product.
First, we will upload the main product photo. Click on the button Upload a Photo and then select a photo to upload from your device (as in Beginner Course Section 1).
Right click and select Save As on this link to download the image we used for this section.
Note that the image we used needs to be cropped and resized. Here is a video on how to do that:
You will then see a screen from which you can edit more details of this product:
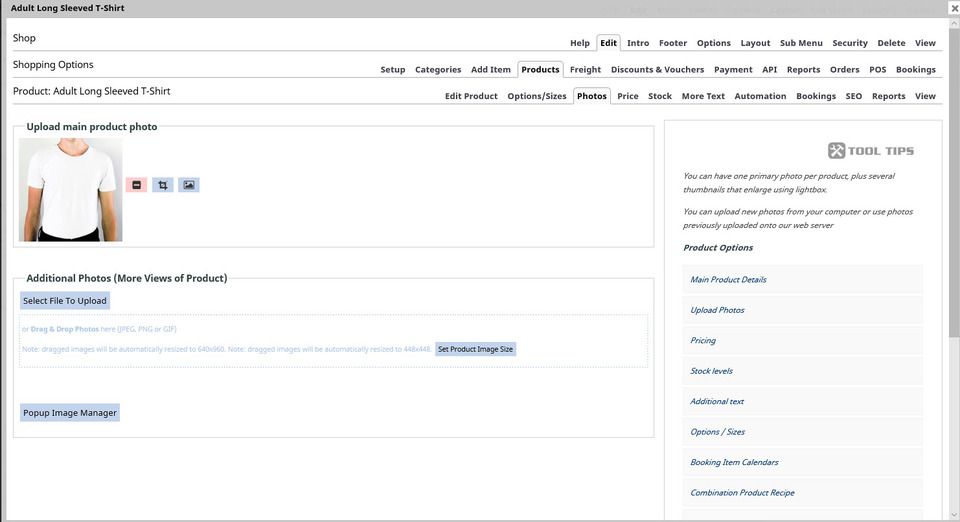
You will note the Product Options menu on the right hand side of the page is also accessible via the menu tab area above when editing a product too. Save your changes so far.
Adding Variations to a Product
If your product is open for editing, you can continue on. If it is closed, you can find it to edit by selecting Shopping - Edit Products and Categories, then selecting the product by clicking the Edit button. By default, the Edit Product tab will open.
To add the variations of t-shirt colour and sizing, you will need to select the Options/Sizes tab.
You will then be seeing a screen which looks like this:
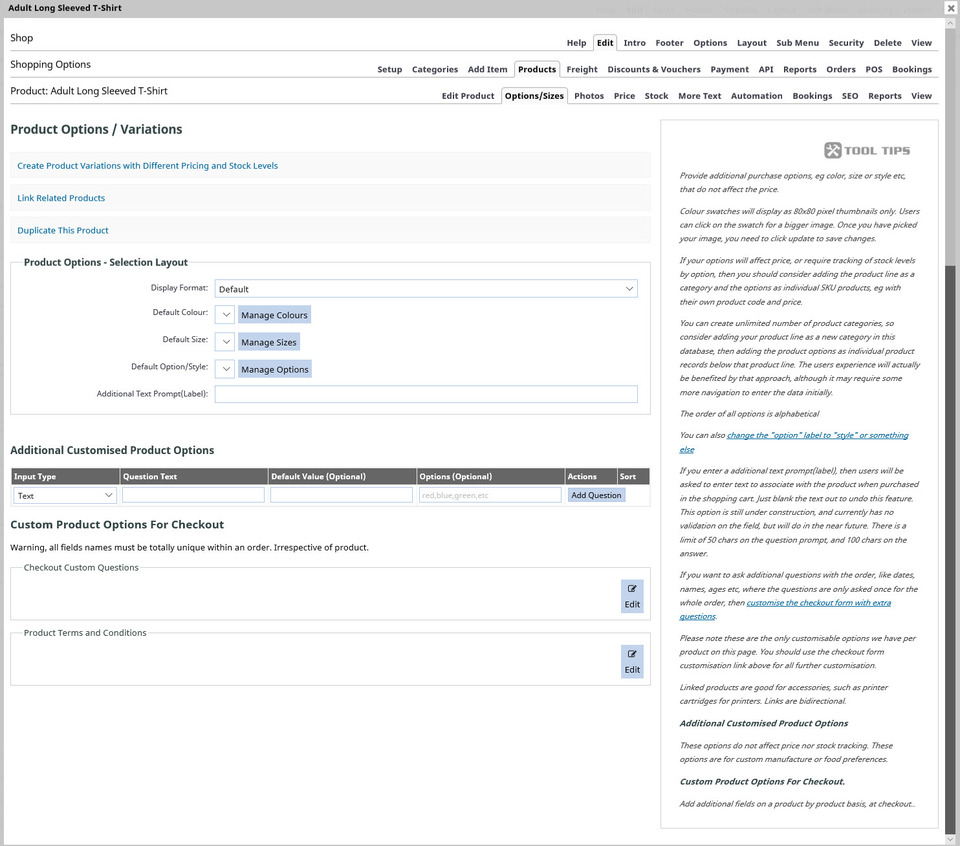
Click on the Manage Colours button which opens up a page that looks like this:
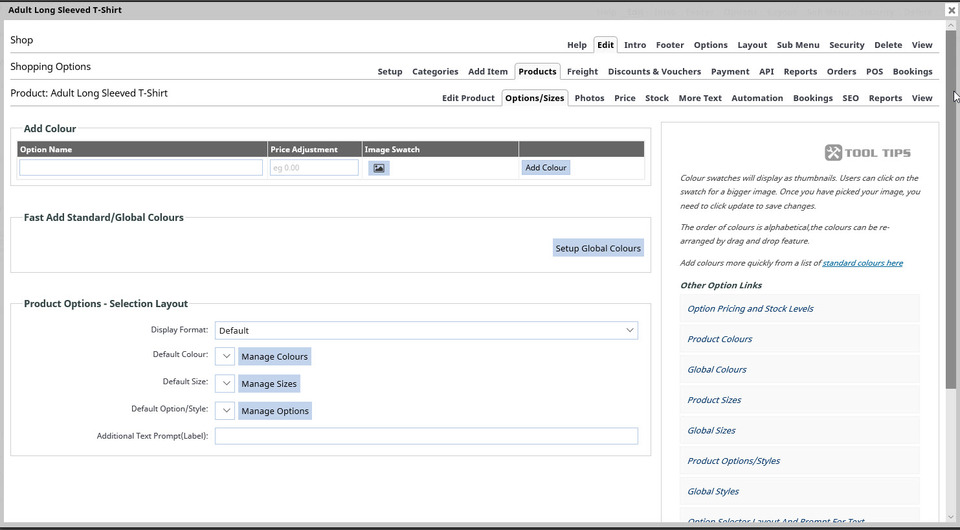
We are going to add each colour individually into the Add Colour box (white, red and blue). Into the Option Name area, we will add the colour name, leave the Price Adjustment box empty, not add an image swatch at this stage (but this is where you would add a specific colour swatch or photo of the specific product colour if you wanted to), and then click the Add Colour button.
Our screen now looks like this:

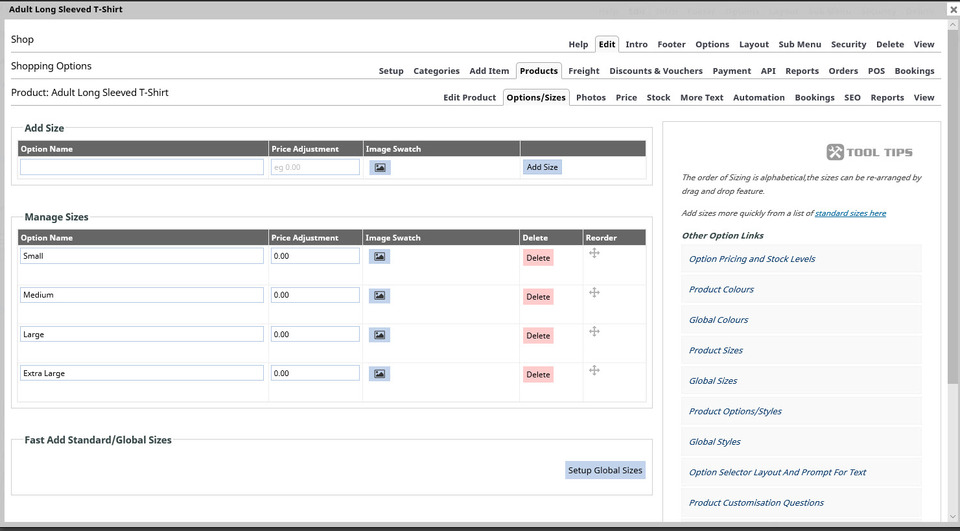
Next we will add some sizing options. Scroll down this same page until you see the Manage Sizes button, which is in the Product Options - Selection Layout area. Click the Manage Sizes button.
Add the t-shirt size options the same way you did the colour options. Add the size to the Option Name box, leave the price adjustment empty (though this is where you would add a different price if a different size cost more or less), and at this stage, don't add an image swatch, then click the Add Size button. Here is what our screen looks like:
Close this box by clicking on the X button in the top right corner, then close the remaining Shop box by also clicking on the X in the top right hand corner. Click the green Publish button to save your work so far, and close the Publishing Now box once the Publishing Complete message appears.
Removing Unwanted Products from Your Shop
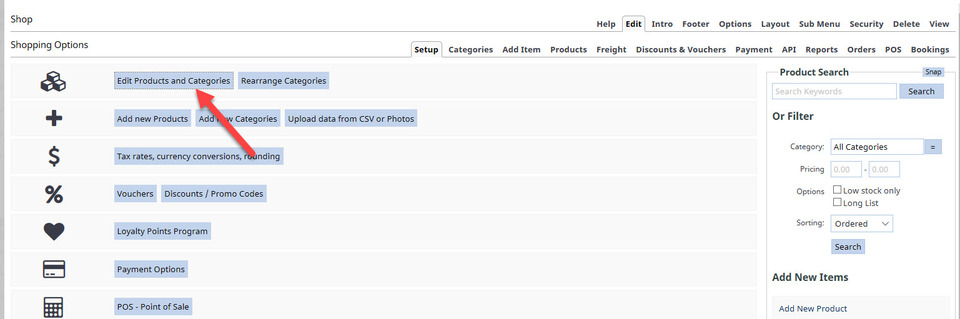
From the main Shop page in the CMS, we are now going to remove the products which were automatically created when we set up the eCommerce trial site. Click on the Edit Products and Categories button.
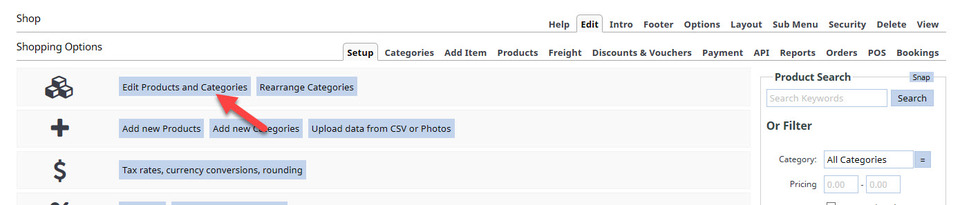
You will then see all of the current products and categories, including the one we have set up (Adult Long Sleeved T-Shirt). In order to delete the categories, we first must delete the products which are in it. As this trial site is not live, we can delete the product without suffering from SEO issues. (If the site was live, you would want to click the Edit button, then the Hide & Block button).
To delete a product, click in the square next to it, then click the Delete button.
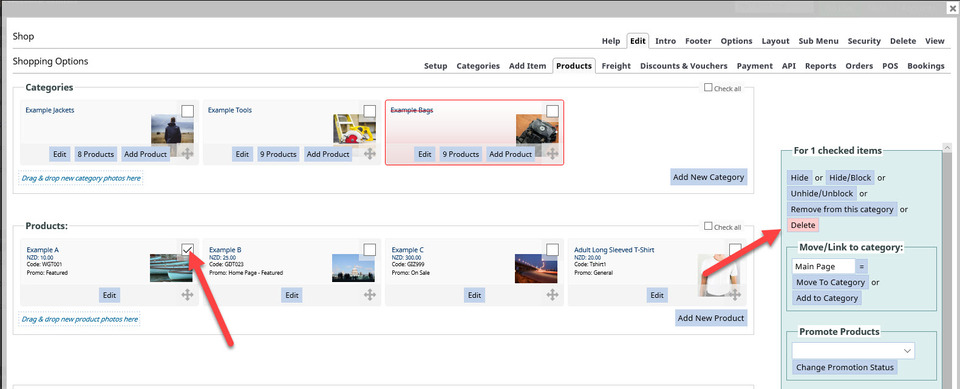
A warning box will pop up asking you if you want to permanently delete it - click the OK box.
Repeat the steps above for the remaining default products.
To remove the default categories, we first must remove all of the products which are inside them. Click on the button for each default category which states how many products it contains, then tick inside the box for each product and click the Delete button.
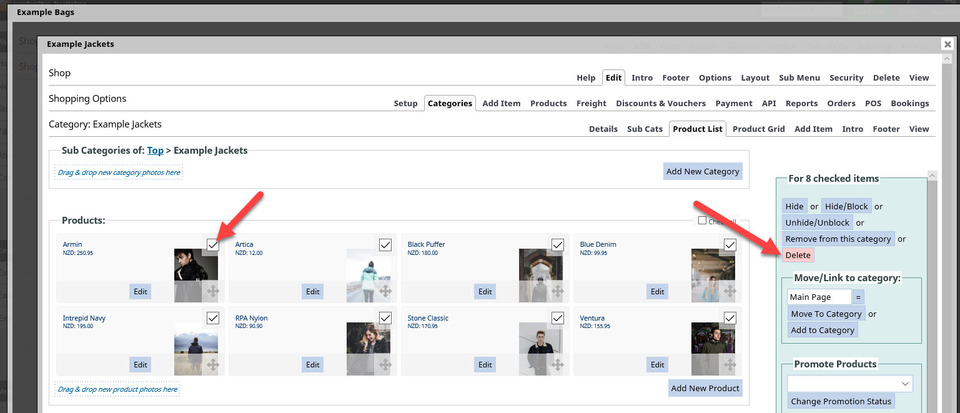
Confirm the deletions, then close the category pop up page until you return to this screen below, when you will again click on the Edit Products and Categories button:
Repeat the removal of all the products from each of the unwanted categories. Once a category is empty of products, you will have the option to delete the category by clicking the Delete button for each.
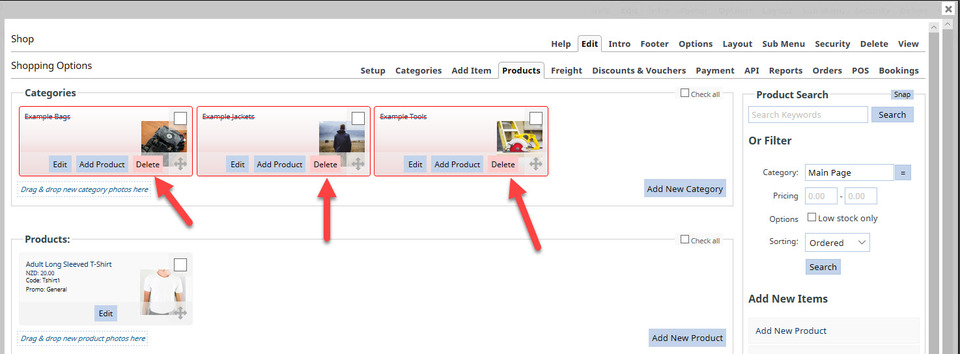
You will now only have one product and no categories left in your shop. Close down the open boxes and click the Publish button to save your work so far.
Adding a New Category
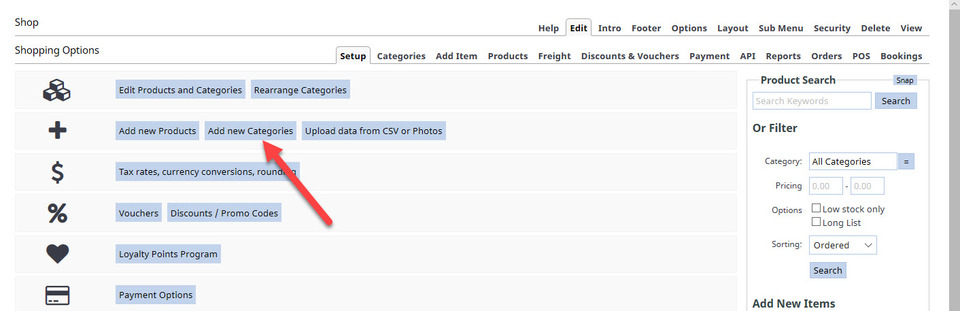
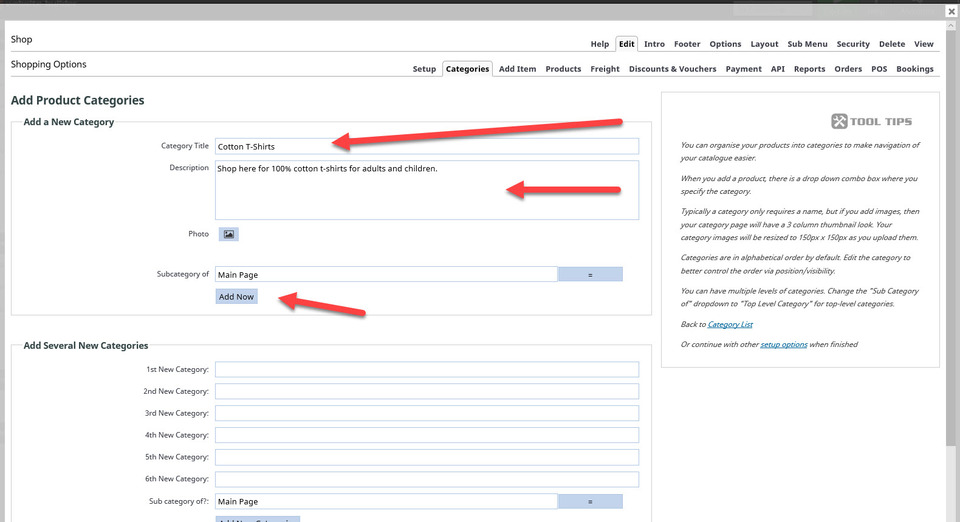
Categories are used to help organise your products, and make it easier for your website visitors to find specific products. From your Shopping Options page, select the Add New Categories button.
Next enter in the details for the new category, as we have done (category title and description only at this stage), then click the Add Now button.
Your Shopping Options area in the CMS will now look like this screenshot.

We now want add the product Adult Long Sleeved T-Shirt to the Cotton T-Shirts category. Click on the Edit button for the product, which opens up this screen:
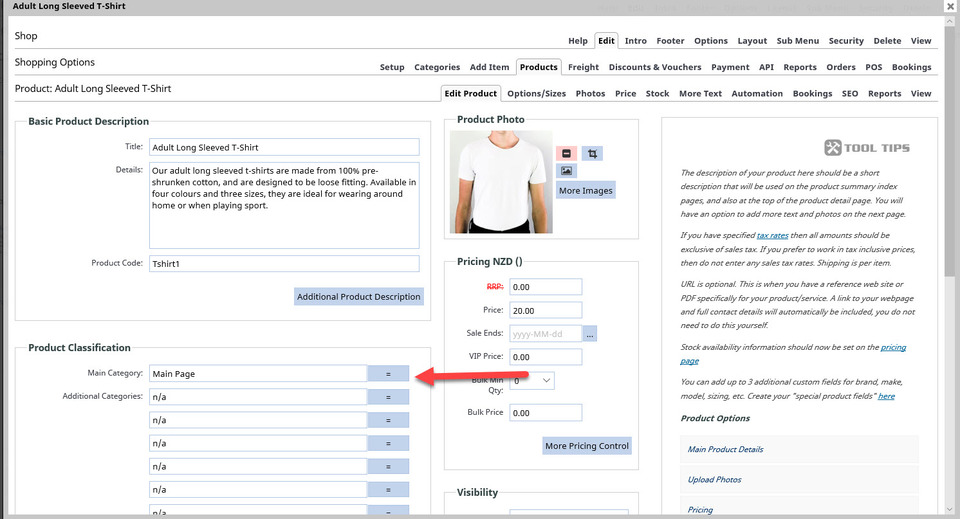
You will need to click on the blue box by the red arrow in the Product Classification area. This will open up a list of current categories for you to pick from. Choose the Cotton T-Shirts option and this will then be reflected in the Main Category box as below:
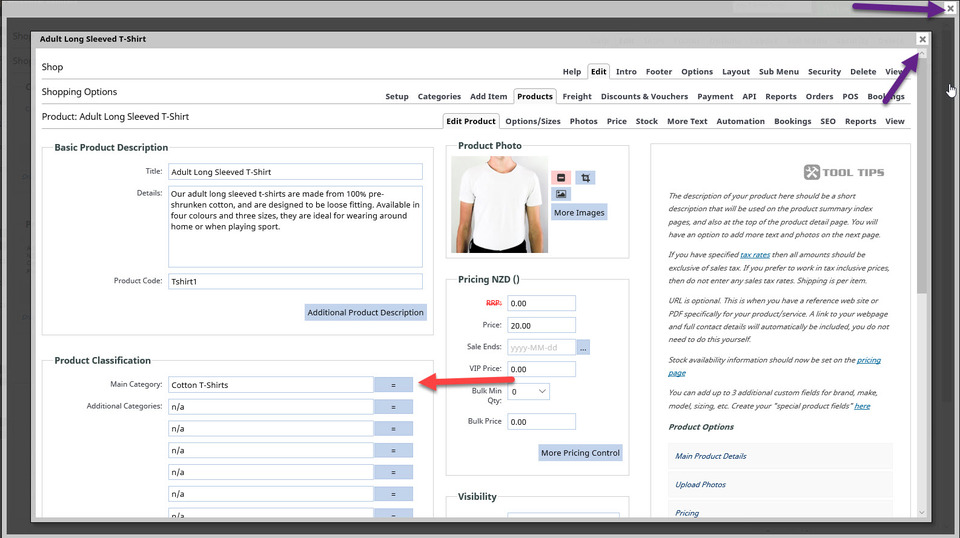
Close both of these boxes by clicking on the X, as per the purple arrows. Press the Publish button to save your work so far. You have now completed Section 4, well done.