
Important: Courier integrations will only work if your website is live.
Includes pricing for PostHaste, Castle Parcels, NZ Post, Now, TNT, EMS, FedEx.
Available as two options: Live pricing or Consignment Label only.
Consignment Label Integration
Follow the below steps to configure courier fulfilment integration.
1. Signup with Zappy
In the CMS:
2. Go to E-commerce タブ.3. Scroll down to the plugin section and find the Zappy plugin.
4. Add the plug in by pressing the + ボタン。
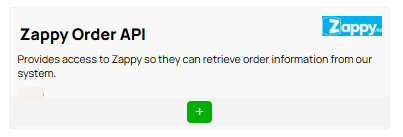
- へ移動 Settings.
- へ移動 E-Commerce/3rd Party Integrations
- Choose Website builder
- Enter the API credentials from the CMS into their configuration screen
- Authenticate
注:
- あなたの WebsiteID should be in the Zappy StoreID
- The API Key/Password in the Zappy Oauth Token.
- Complete the other fields within the Zappy form and then Save.
Ticket info Update:
- If you choose 'No', Zappy won't update your CMS orders, you have to change the order manually.
- If you choose 'Yes', Zappy will update fulfillment of your CMS order.

Live Pricing
Zappy API Integration Instructions
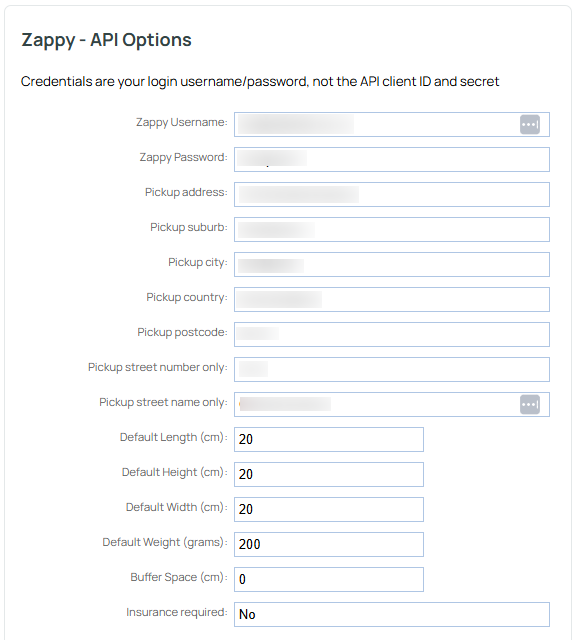
To setup Live Pricing you will require your Zappy login username and password, pickup address details, and some generic product dimensions.
The set up for this is in the CMS.
- へ移動 e-commerce > Freight
- Scroll down to the live pricing integrations section - this is different to the consignment label area.
- 選択 Zappy.
Live pricing is not available on the lower hosting plan - if you do not see the live pricing options, you may need to upgrade your hosting plan to access the live pricing API.
- Your username and password are the ones you use to sign into your Zappy dashboard.
- Enter the address that your courier will normally pick up from - usually your business.
- Enter some fallback dimensions and weight - these are used if a product should have missing weights/dimensions.
- Buffer space if the amount of space around the product once packed. You might allow for some, or you may not.
- Specify if insurance is required by default.
How to find my orders in Zappy:
Choose Domestic or International in the top bar to start a consignment
Press the Orders button in Step 2 as below screenshot.
Your orders should be listed in the next screen, depending on how you have those filters set.

More From This Section
FAQ Topics
The Basics
Building your site
- Pages
- Content Editor Modes Explained
- - DRAG DROP Editor (Default)
- - CONTENTBOX Editor (Advanced)
- - WORD STYLE Editor (TinyMCE)
- - LIVE Editor (Click to Edit Mode)
- Styling Content
- Images / Backgrounds
- Banners and Sliders
- Uploading content
- Design Templates
- Forms
- More Q & A
- Menus
- Mobile Styling and Optimisation
Advanced Page Types
E-Commerce
- Shopping Basics
- Product Pricing, Currencies
- Category Management
- 製品
- Product Options
- Layout and Formatting
- 支払いオプション
- Freight - Couriers
- Processing Orders
- Orders / Invoices
- Advanced Ecommerce
- Plugins
- Wholesale
- Bookings Management System
- Stock & Quantities
- Vouchers, Discounts, Loyalty Points
- Selling Photos / Prints
- Shopping Cart Add-on Page types
- Advanced APIs / Add ons
- 販売時点管理(POS)
- Reports
Email & Membership
- Member Management
- Members Pages / Template Customisations
- From Addresses and Reply To Email Notifications
- Global Enquiry form options
- Standard Field Names
- Webmail
- Bulk Email
- CRM Features
- Email Campaigns
- Forums & Blogs
- Pop3/Imap Email Services
- Scams and Hoaxes
- Lead Magnets / Growing Your Customer Database
Promoting your site
Advanced
- Power User Options
- Form Spam Filtering
- Wordpress
- PHP Setup
- [TAGS]
- jQuery snippets
- Search External Links / Import external content
- HTML / CSS Snippets
- Embedding Web Fonts
- Loading additional Material Symbols styles
- FAQ Help Map
- Uploading local font files
- Advanced Template Customisation, CSS, etc
- Languages and Translations
- Importing Content from Another Platform
